Thursday, September 19, 2013

Eggshell Geodes

This has to be one of my favorite science experiments! We have made crystals in different ways, but the crystal formations from one method we tried was just amazing.

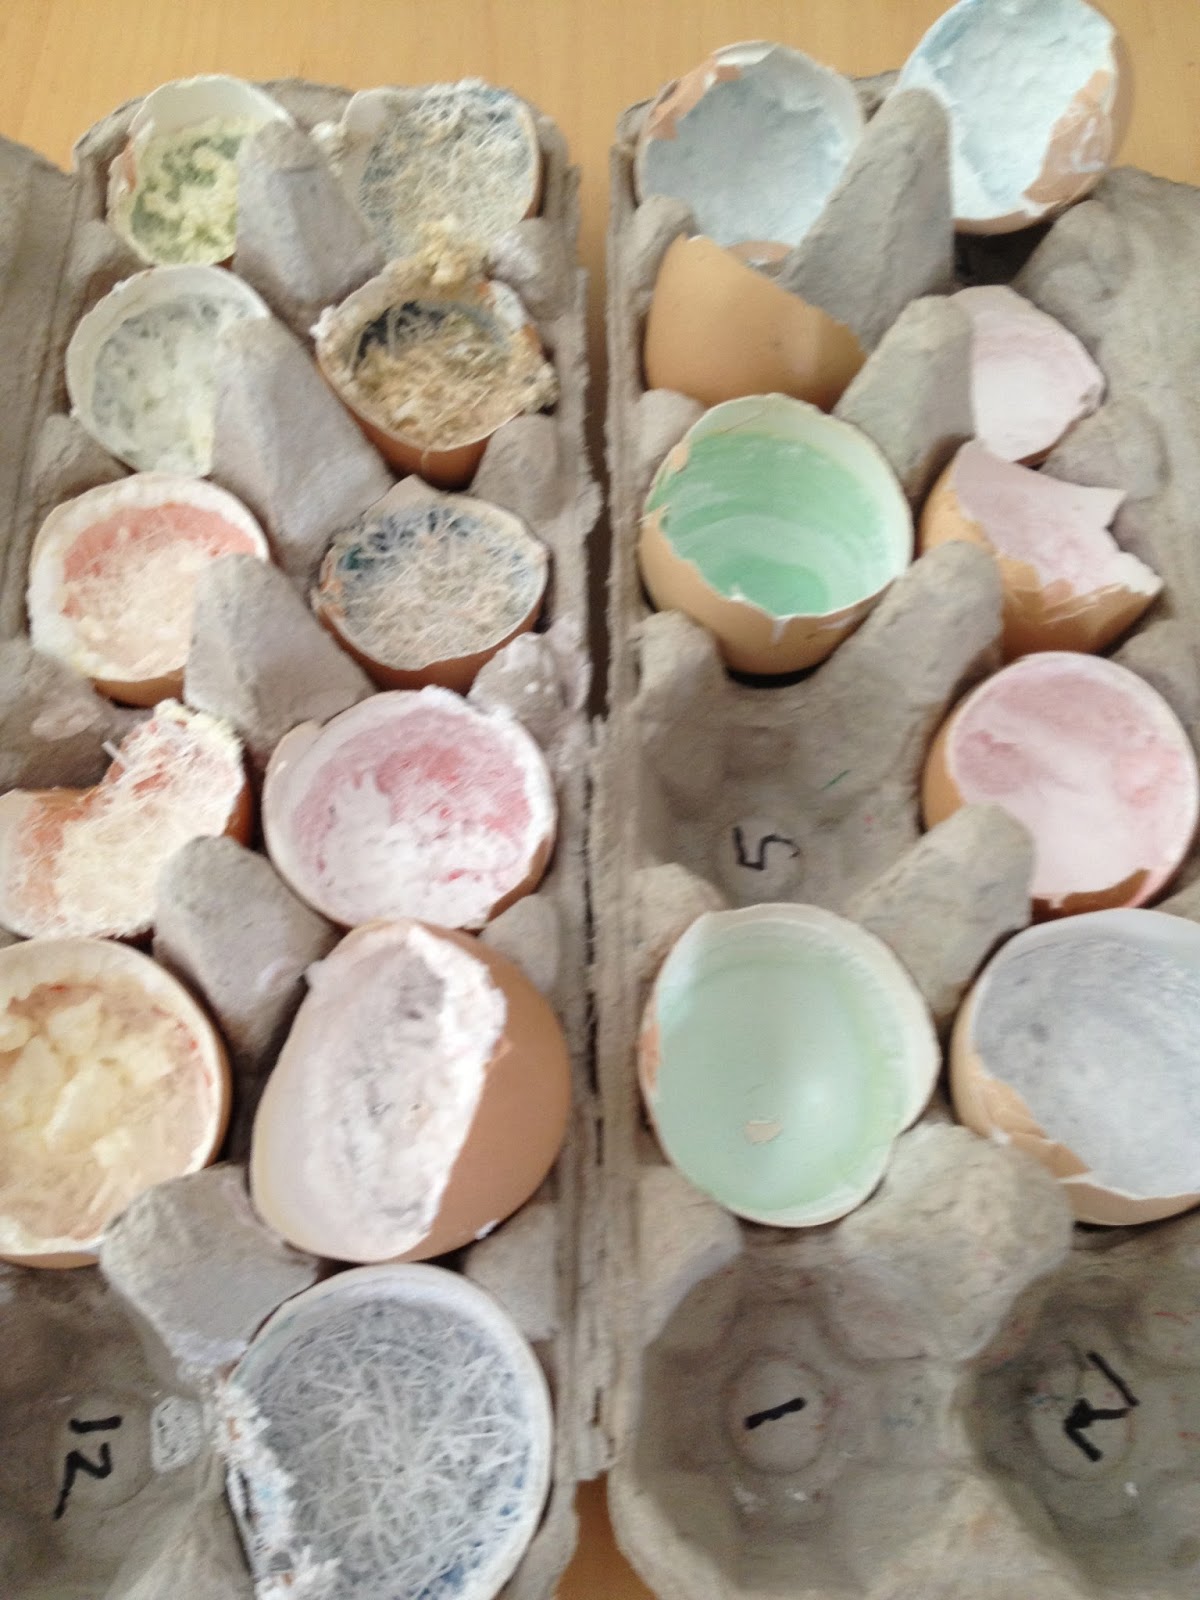
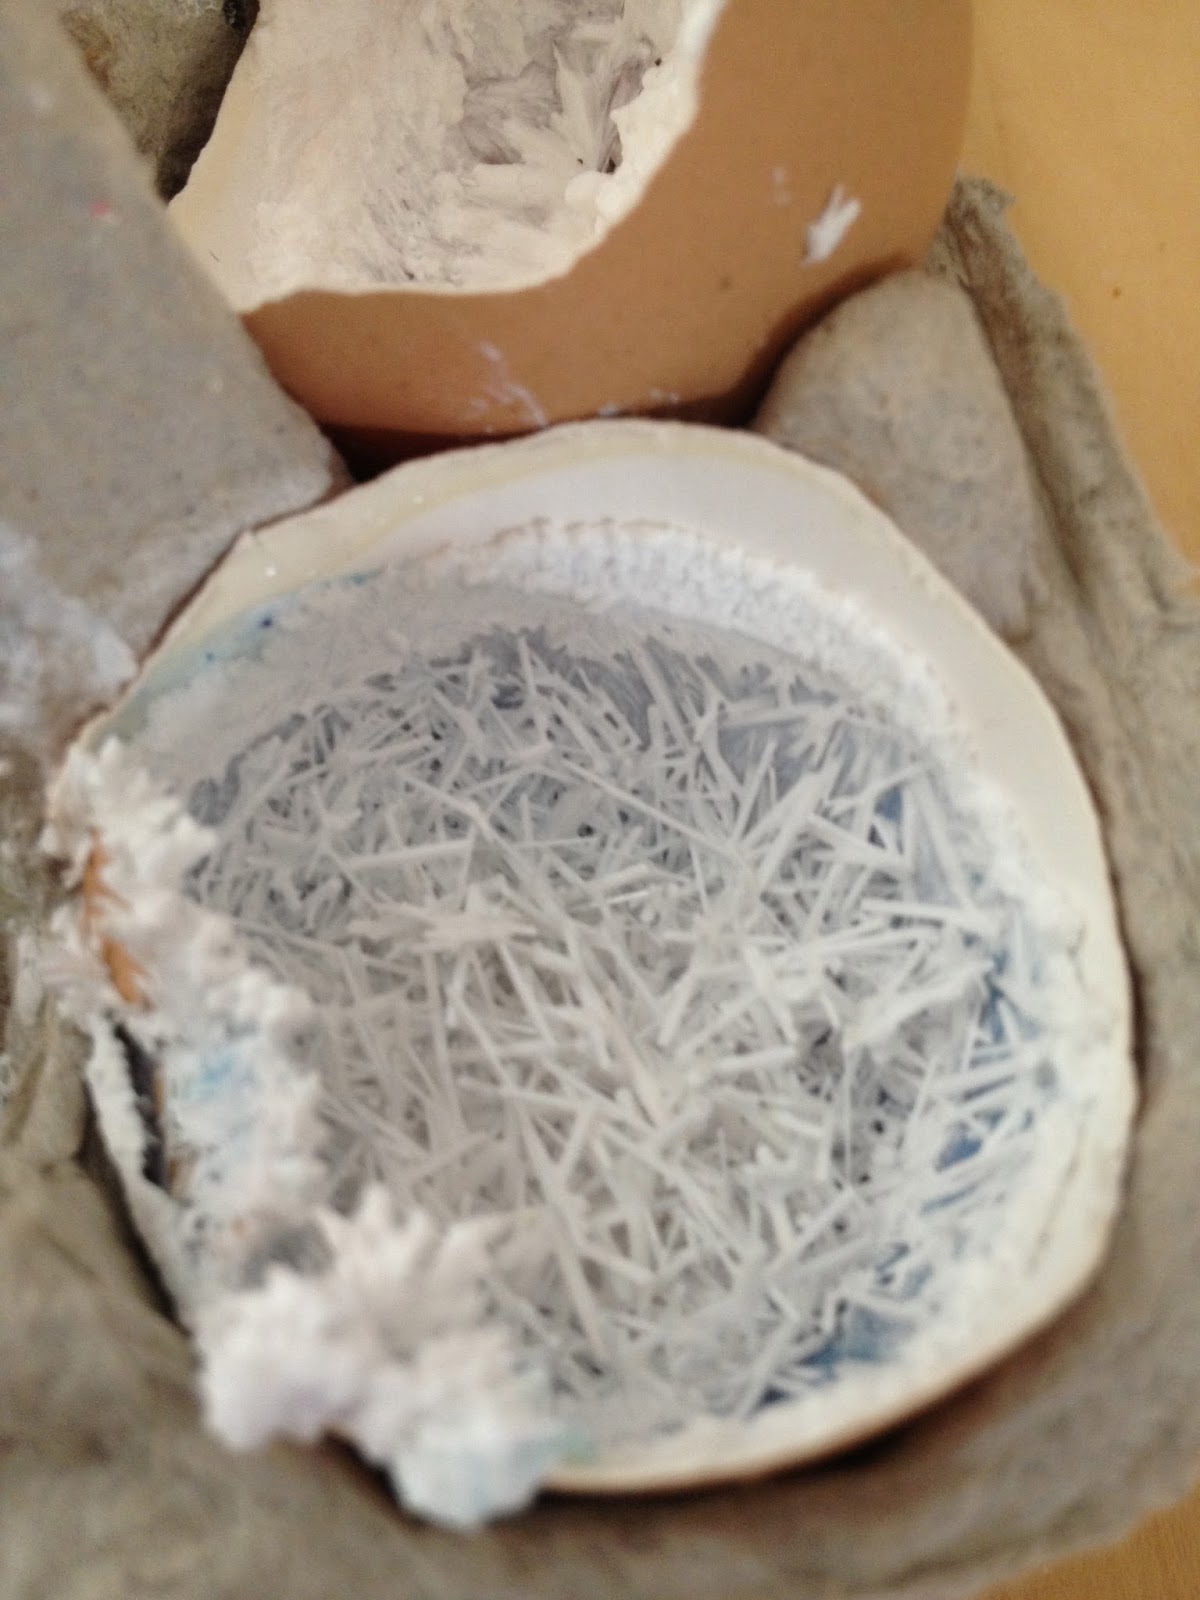
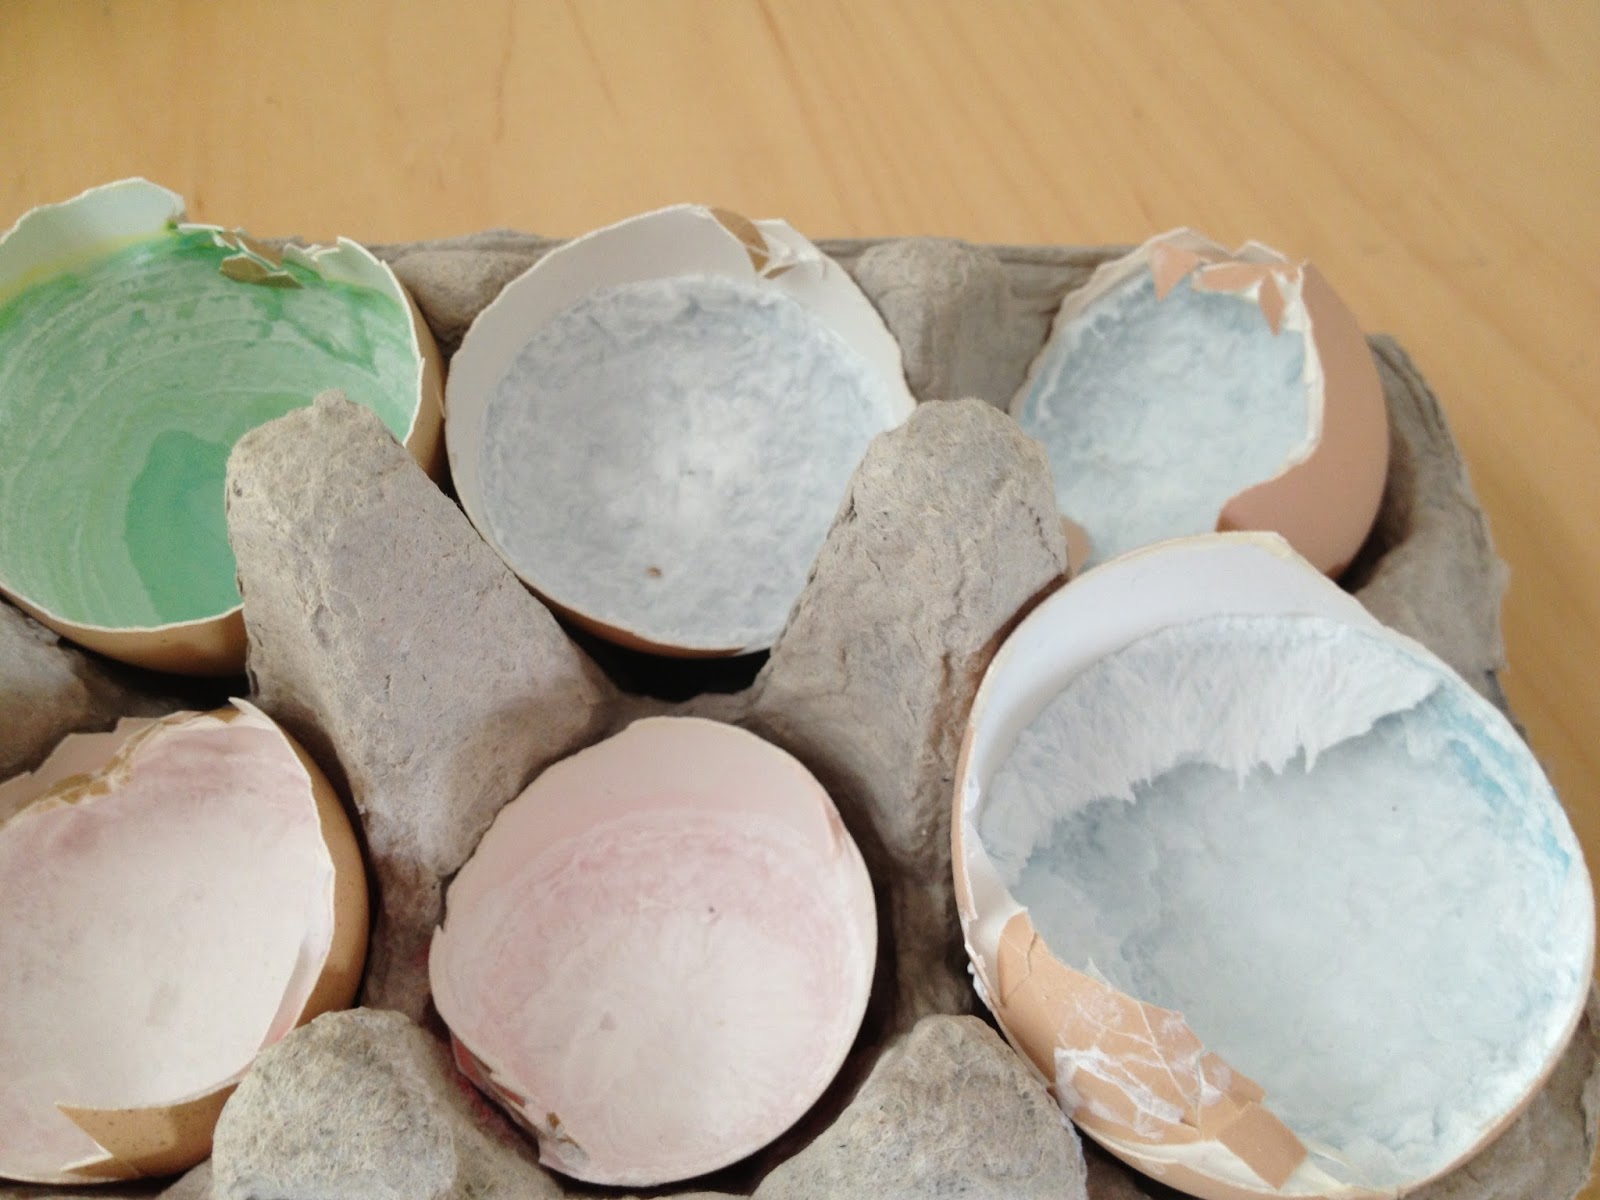
Directions for these "geodes" can be found all over the internet, and these are made from Epsom salts and water.  The photograph above shows the results of two different curing methods. The carton on the left was grown in the refrigerator. The one on the right was left in the kitchen window to dry out. These pictures were taken a couple of months after we made them, so the original color has faded somewhat.

The refrigerator method gave much larger, more impressive crystals. For both batches we used these basic instructions. On another blog I read the idea of putting them in the refrigerator to crystalize, but I'm afraid I can't remember what blog it was. Another hint I read from the unnamed blog was to make sure you have a good slurry. It's the slurry you want in your shells, not the thin top liquid.
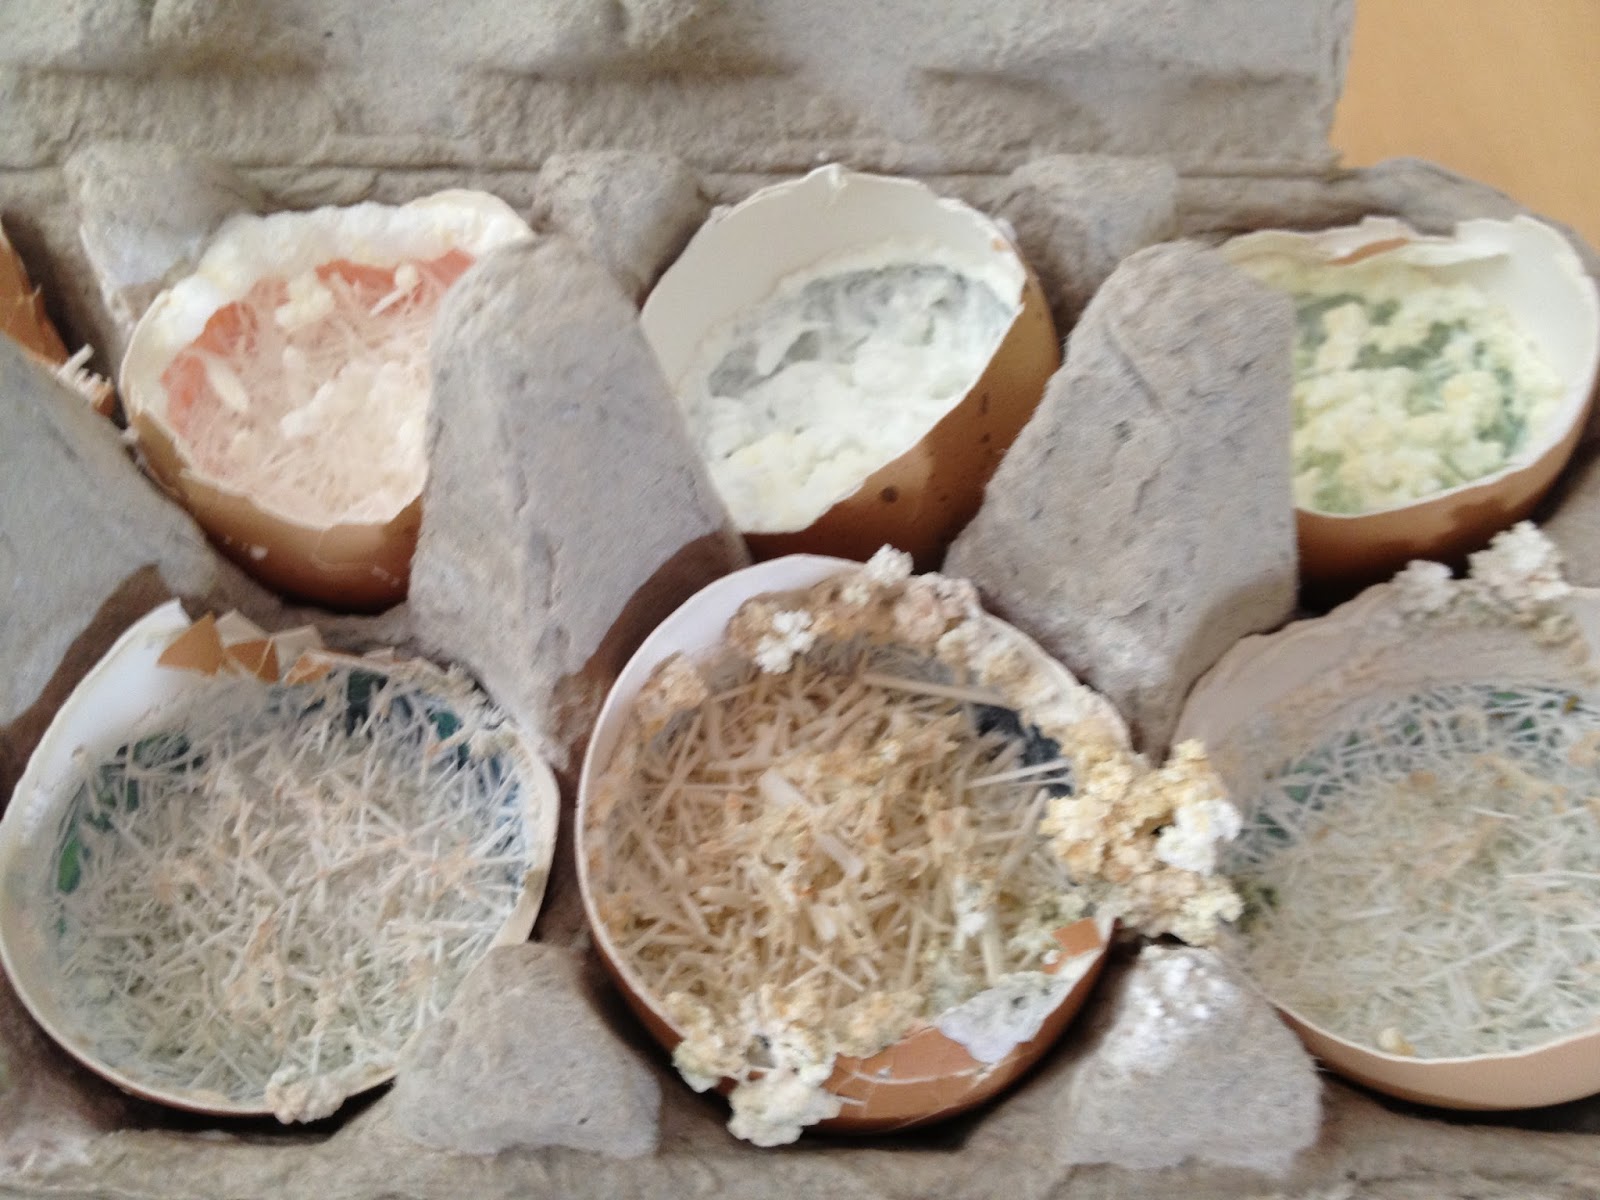
Here is a close up of the air dried version. The crystals were much finer, and sparse. It actually took about a week longer for the liquid to dissolve in the air dried shells versus the ones in the fridge!

It's a simple experiment, calling only for a few ingredients and about ten minutes of actual work time. I had been saving eggshells for a few weeks prior, rinsing them and letting them dry in the kitchen window. The fun came in watching the crystals emerge over the next two weeks. 

Monday, September 16, 2013

Review Rings


We are starting to find a comfortable rhythm for this school year now, so for the next couple of posts I will be sharing some of our strategies and creative lessons that we have planned for the year. I have always incorporated review into our plans, but I can't say that the kids rejoice over worksheets. I wanted to include systematic review this year, since we deal with attention issues around here, but I didn't want it to be cumbersome for me or the kids. The review rings were born. 

They are exactly as they sound - review cards on a binder ring. I started out making them from cut up old worksheets and textbook pages, with some flash cards thrown in for good measure. I then added some hand written cards that touched on topics from social studies, science, and the literature we have read. Of course I pulled out my trusty laminator so I could reuse the cards during the year and for the little one in the future.


There are only a few problems per card (sometimes only a single question), so the kids don't find them overwhelming. The wipe off factor seems to help, too. For some reason, using a wipe off pen seems less burdensome to my two students than a pencil. They are part of their daily independent work time. My goal is to create a few more each Sunday, covering what we learned the previous week.

I covered a baby shoebox with scrapbook paper to make a home for the cards. I added dividers by subject, and I simply file the ones they have completed in the back of each section. I don't keep track of which cards they have completed because it is review, after all. If they get the same math card again, that's fine with me. Practice never hurts.

Alex thought those cards were pretty cool, too, so he got his own set. I found some adorable color and number flash cards at Mr. Printables. If you have never been there, you must check out his site. It is fantastic. The Dollar Spot at Target also had some great photo and Dr. Seuss flashcards, so now the baby has more cards than the kids! He very much enjoys dumping all of the out of his box and spreading them around the floor. I wish he also enjoyed picking them back up!