Friday, December 6, 2013

Lego Geometry - Circles


Circles from rectangular building blocks? Am I crazy? No, I did not give the kids the task of creating circles from Legos, but we did create tools from Legos to make circles! The bricks pictured above are the ones we found in our collection that worked the best, but sort through yours and see what you can find.


Our favorite compass consisted of a long rectangular flat block with a half circle piece at each end (the kind with the holes). To make a circle, secure the compass at one end with a sharp pencil, then use a second pencil through the other hole to trace your arc. It helps if you tape the paper down first or have somebody hold it.


Flat pieces that have holes in the center also work well. The circular piece needs a very sharp pencil point as only a small portion shows.


The kids experimented with different sized pieces to make smaller and larger circles. We discussed pi and they measured diameter and radius, as well as calculating circumference. Who said Legos can't make circles?


Sunday, October 13, 2013

Lego Geometry - Triangles and Polygons


After learning about the different types of angles, building them with Legos and measuring the tracings with protractors, we moved on to triangles and polygons. It's a pretty easy leap to take your Lego angles and add a third piece to make a triangle.


Easy in theory, yes, but in reality it can be difficult to find a third piece that is just the right size. Make sure you have as many pieces as you can scrounge out of those Lego bins for this activity, and remember you are looking for the shape inside the Lego, not around the perimeter. You would have a pretty wonky triangle if you tried to trace the outside, but look how nice they come out when you trace inside! We classified our triangles by sides ( equilateral, isosceles and scalene) and angles (right, acute and obtuse), then the kids traced examples of each in their math notebooks. You could also measure the angles of the triangles you traced with your protractor.


Break out those double row bricks for polygons, and of course you can use your single rows as well. The kids had fun combining different bricks to make some wild polygons. A polygon is a multi-sided  two dimensional figure made up of three or more line segments, so you can really go to town with building these shapes. We started out with traditional shapes such as squares and rectangles, then moved on to more creative builds. Since these were rather large constructions, the kids drew their examples instead of tracing them.

The real challenge is coming up next time - circles!

Tuesday, October 8, 2013

Lego Geometry - angles


Math is not a favorite subject for either of my children, even though it comes so easily to Max. I am always looking for a way to make it more fun, more appealing, and nothing is more appealing to my kids than Legos. So, when we started a geometry unit, I thought it would be a perfect pairing. I sorted through the Lego baskets and pulled pieces that would work well with line segments and angles, our first lessons. I mostly selected the thin, single row Legos you see above, in different lengths. I introduced the concept of lines and line segments using the pieces, then we made parallel and perpendicular lines using the bricks.

Taking those line segments and perpendicular lines, we snapped them together (or pivoted them, in the case of perpendicular lines) to create angles. We opened them to different widths to show acute, right and obtuse angles.


We traced them in our math journals and labeled the three different kinds of angles. You need to trace the inside of the angle, not the outside. It also helps if someone holds it, because they have a tendency to shift on you while you are tracing!


The next day I told the kids to create five different angles and trace them in their notebooks. I expected that they would make five individual angles, but they both surprised me with their approach. Max made one angle, then just pivoted it to create different degrees. Madeline took the right brain approach and created the structure on the right, then laid it in her notebook and traced the different angles it creates. I love their creative problem solving!

Thursday, September 19, 2013

Eggshell Geodes

This has to be one of my favorite science experiments! We have made crystals in different ways, but the crystal formations from one method we tried was just amazing.

Directions for these "geodes" can be found all over the internet, and these are made from Epsom salts and water.  The photograph above shows the results of two different curing methods. The carton on the left was grown in the refrigerator. The one on the right was left in the kitchen window to dry out. These pictures were taken a couple of months after we made them, so the original color has faded somewhat.

The refrigerator method gave much larger, more impressive crystals. For both batches we used these basic instructions. On another blog I read the idea of putting them in the refrigerator to crystalize, but I'm afraid I can't remember what blog it was. Another hint I read from the unnamed blog was to make sure you have a good slurry. It's the slurry you want in your shells, not the thin top liquid.
Here is a close up of the air dried version. The crystals were much finer, and sparse. It actually took about a week longer for the liquid to dissolve in the air dried shells versus the ones in the fridge!

It's a simple experiment, calling only for a few ingredients and about ten minutes of actual work time. I had been saving eggshells for a few weeks prior, rinsing them and letting them dry in the kitchen window. The fun came in watching the crystals emerge over the next two weeks. 

Monday, September 16, 2013

Review Rings


We are starting to find a comfortable rhythm for this school year now, so for the next couple of posts I will be sharing some of our strategies and creative lessons that we have planned for the year. I have always incorporated review into our plans, but I can't say that the kids rejoice over worksheets. I wanted to include systematic review this year, since we deal with attention issues around here, but I didn't want it to be cumbersome for me or the kids. The review rings were born. 

They are exactly as they sound - review cards on a binder ring. I started out making them from cut up old worksheets and textbook pages, with some flash cards thrown in for good measure. I then added some hand written cards that touched on topics from social studies, science, and the literature we have read. Of course I pulled out my trusty laminator so I could reuse the cards during the year and for the little one in the future.


There are only a few problems per card (sometimes only a single question), so the kids don't find them overwhelming. The wipe off factor seems to help, too. For some reason, using a wipe off pen seems less burdensome to my two students than a pencil. They are part of their daily independent work time. My goal is to create a few more each Sunday, covering what we learned the previous week.

I covered a baby shoebox with scrapbook paper to make a home for the cards. I added dividers by subject, and I simply file the ones they have completed in the back of each section. I don't keep track of which cards they have completed because it is review, after all. If they get the same math card again, that's fine with me. Practice never hurts.

Alex thought those cards were pretty cool, too, so he got his own set. I found some adorable color and number flash cards at Mr. Printables. If you have never been there, you must check out his site. It is fantastic. The Dollar Spot at Target also had some great photo and Dr. Seuss flashcards, so now the baby has more cards than the kids! He very much enjoys dumping all of the out of his box and spreading them around the floor. I wish he also enjoyed picking them back up!


Thursday, August 1, 2013

You Are My Sunshine Party

Yes, it's official - the baby is now a toddler. We had a small family party with a You Are My Sunshine theme. I had many plans for decor and food, but when the little guy decided to cut four teeth at once (yes, four!) the week before his party, I had to let many things go. That's okay; I'm pretty sure he didn't notice. I have some lovely felt and fabric birthday crowns pinned to my birthday board, but teething dictated a faster design. So, with a little craft felt and hot glue we had a birthday crown in the colors of the party. I used scrapbook paper from my stash to make the pinwheels on the table, and I placed a few in the grass leading up to the front door.


The plans for the pre-made mason jar drinks didn't quite materialize, but at least the straws and the jars did.


Sun, clouds, hot air balloons all worked together here. The baskets were made from strawberry baskets covered with scrapbook paper. The link for the cloud directions is on my birthday board.


Clouds were scattered on shelves as well. I used the yellow paper lanterns from the Lego Party on shelves in the living room.


Of course there had to be buntings! Most of the buntings were ones I had made for my mother's birthday party a few years ago, and fortunately they had the right color scheme, as did my wall;)


I really tried to pull all of my materials from my own stash, including the top banner. The letters were stamped onto punched kraft paper circles.


The back wall held our sun. I like big displays for decorating.

The banner was hand lettered on paper and the ends are scrapbook paper.


Of course there had to be a sun!
I used my GFCF carrot cake recipe for the cupcakes.
I couldn't resist adding a few cute shots!


Happy Birthday Alex!

Sunday, May 19, 2013

The Lego Birthday

For a boy who has been obsessed with Lego from pretty much birth, it has taken us nine years to actually have a Lego themed birthday party. Of course the first place I turned was Pinterest, and you can find all of my inspiration on my birthday ideas board. I will be the first to admit that I was a bit over ambitious, considering I had an eight month old competing for my attention, but I think the late night crafting sessions were worth it.

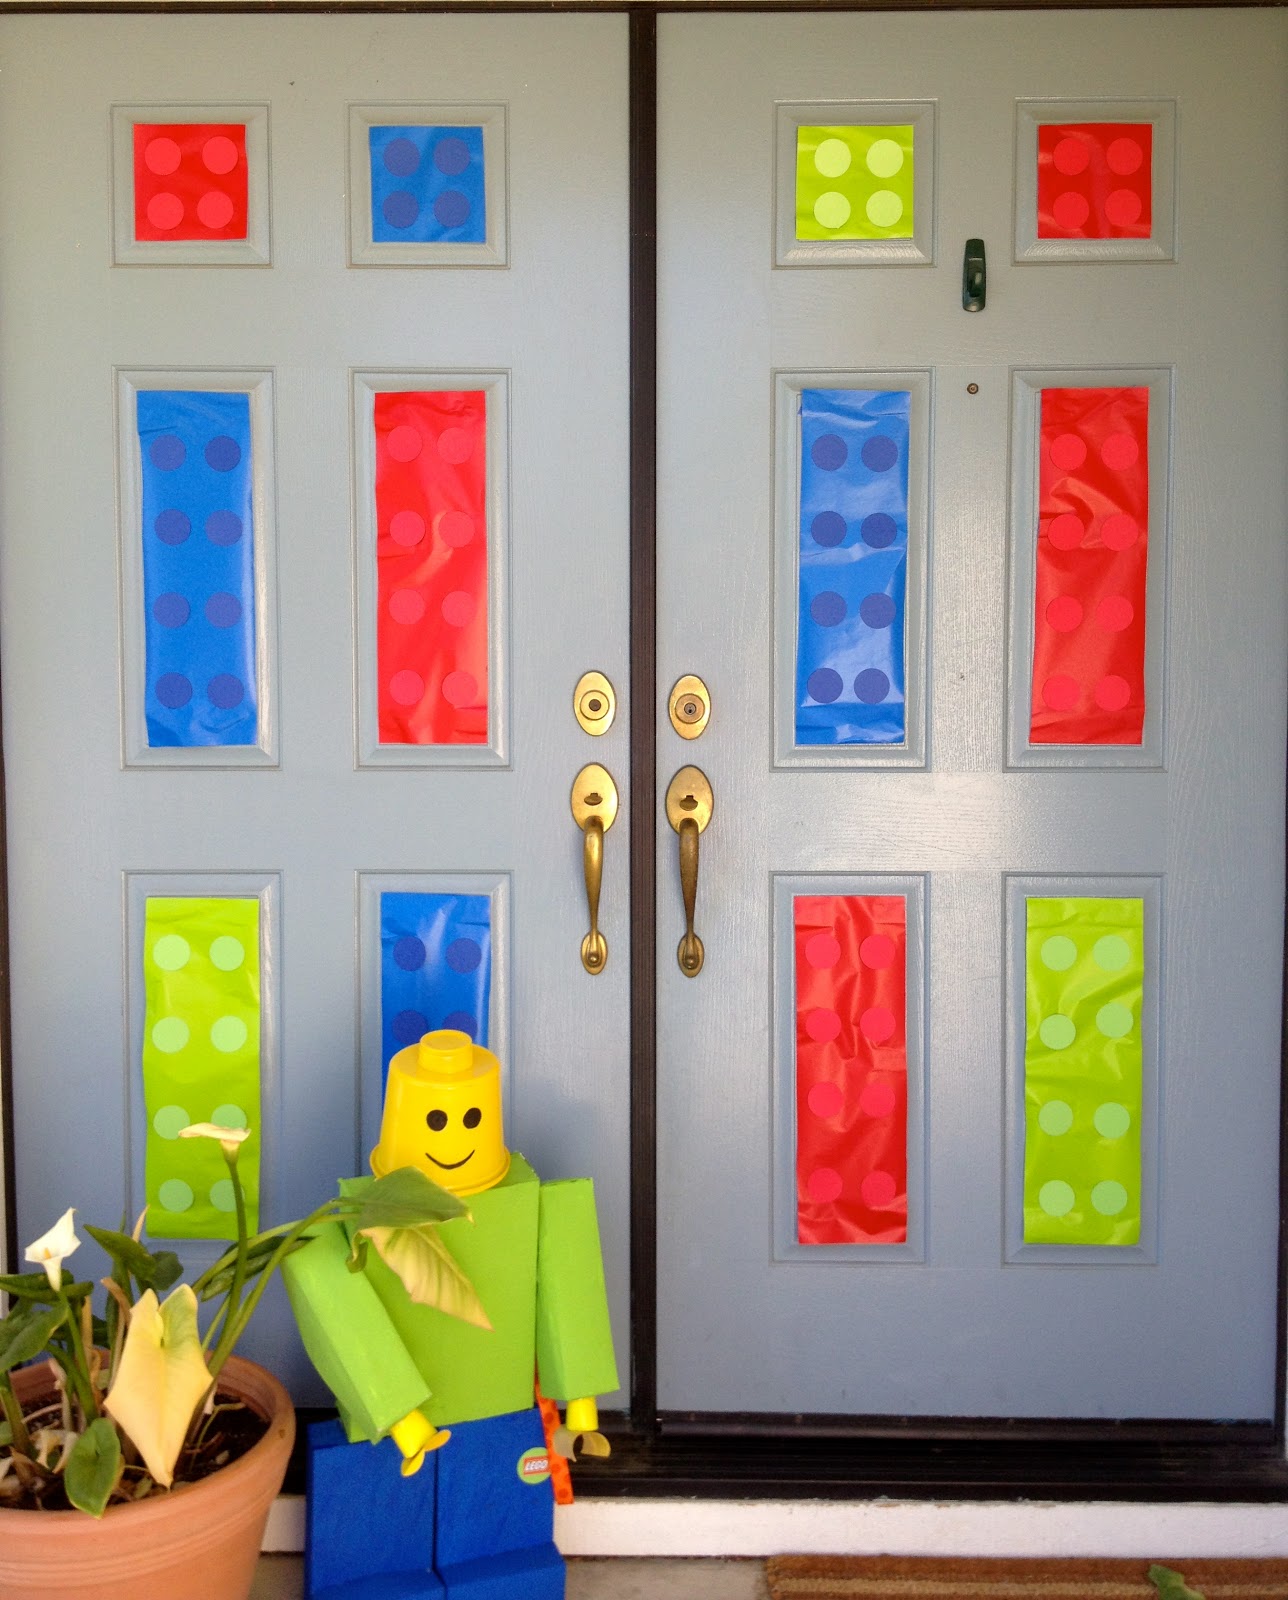
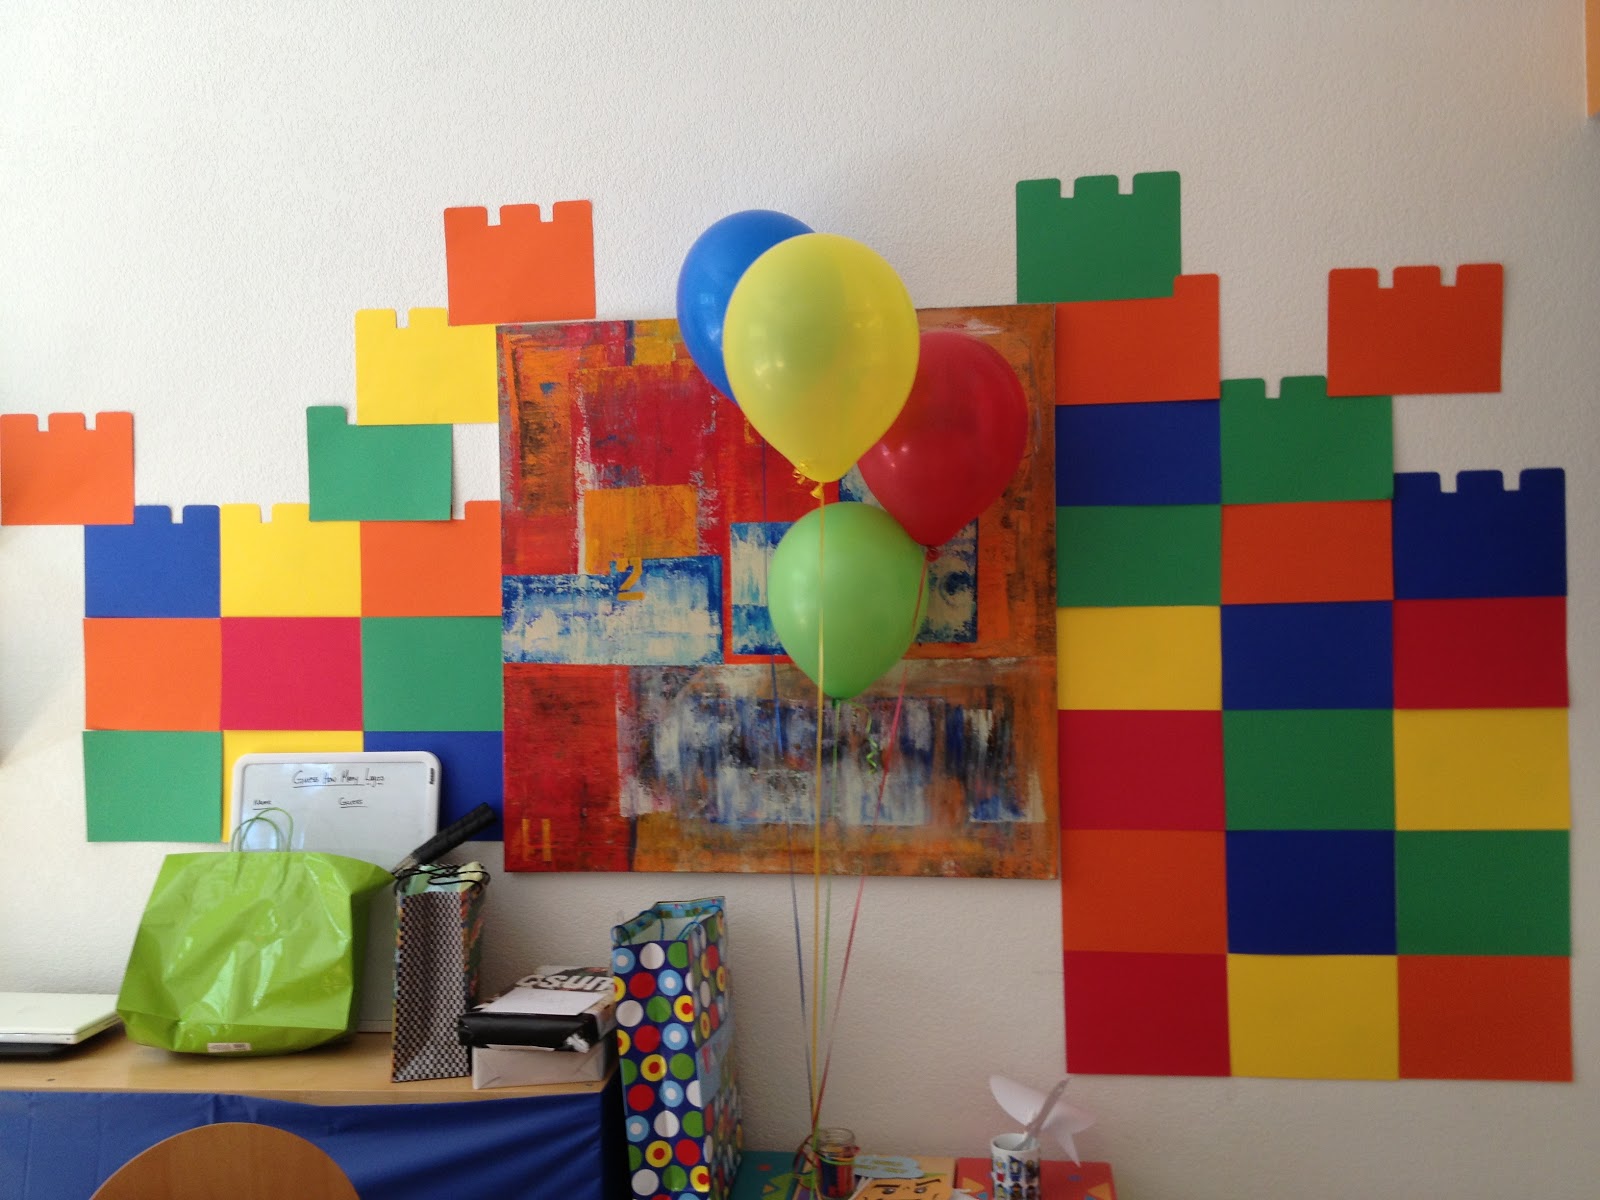
I used wrapping paper and punched cardstock circles to turn our front door into giant lego bricks. The Lego figure (our third place scarecrow from the Ruth Bancroft gardens contest last fall) held a bunch of balloons on the day of the party to welcome guests.

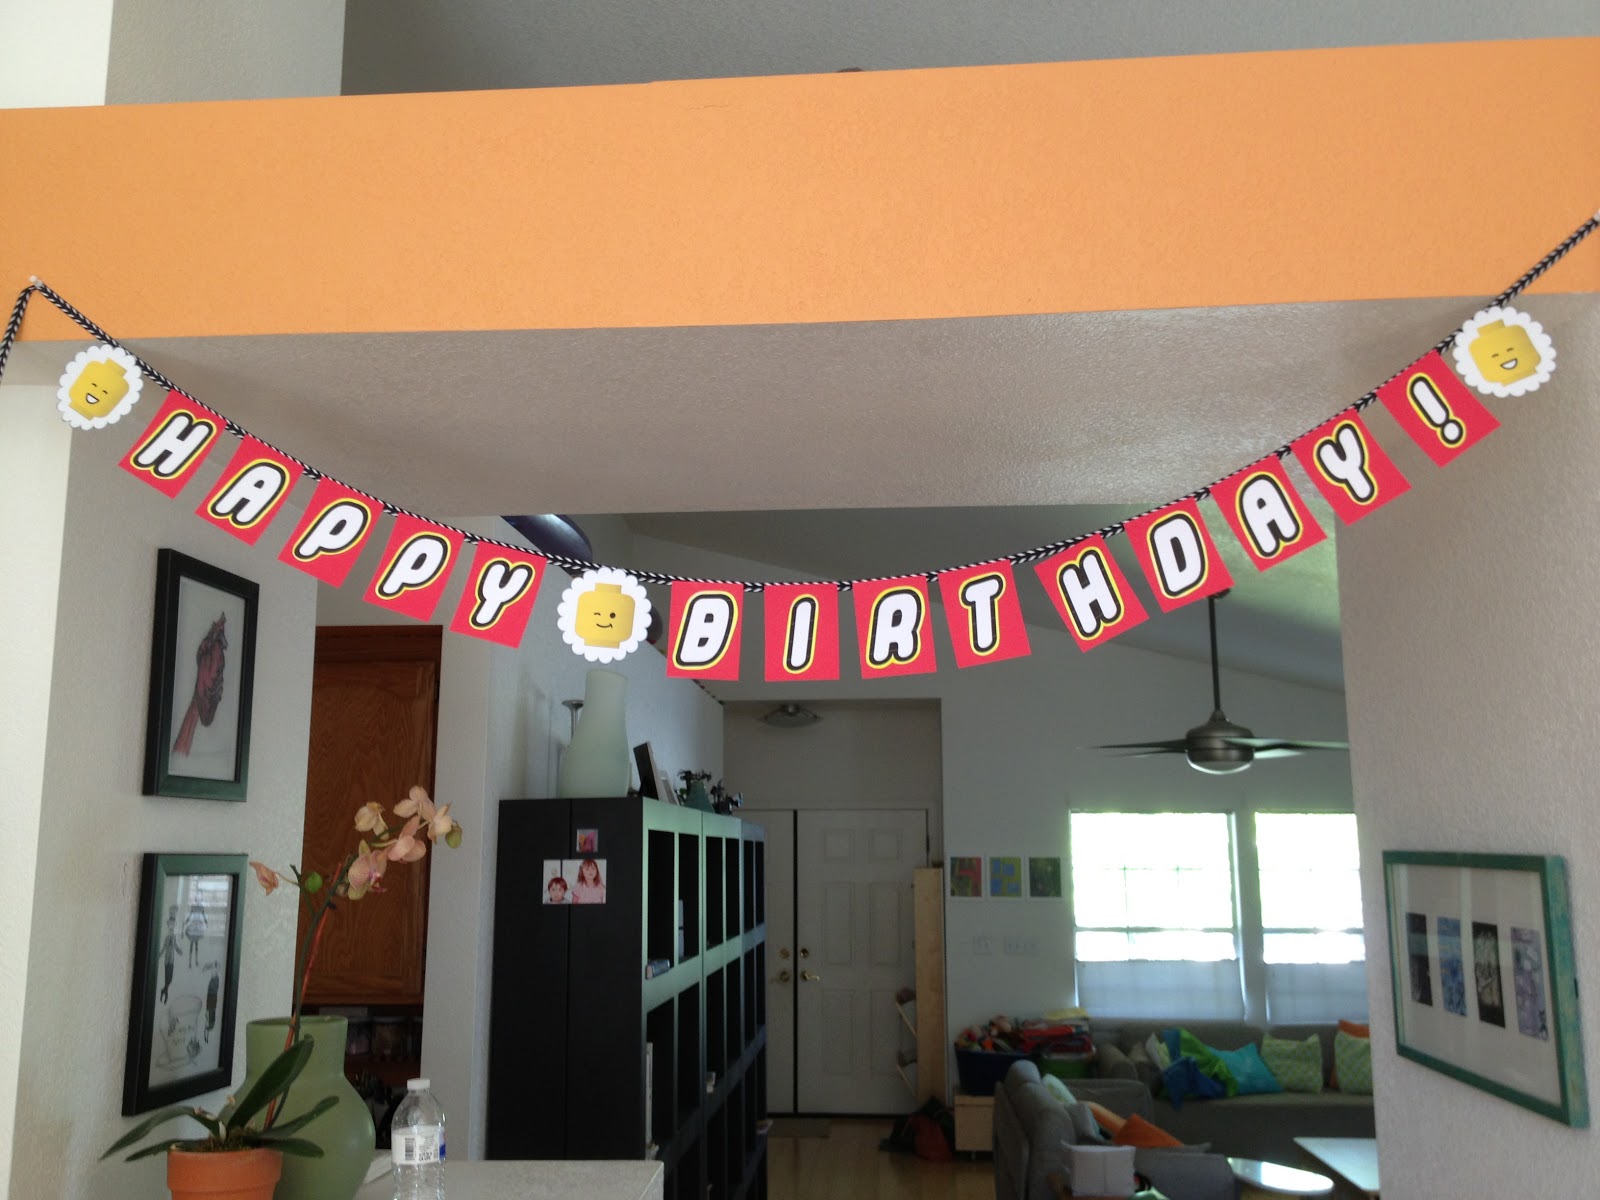
A birthday banner made using a Lego font and printables found on Pinterest.
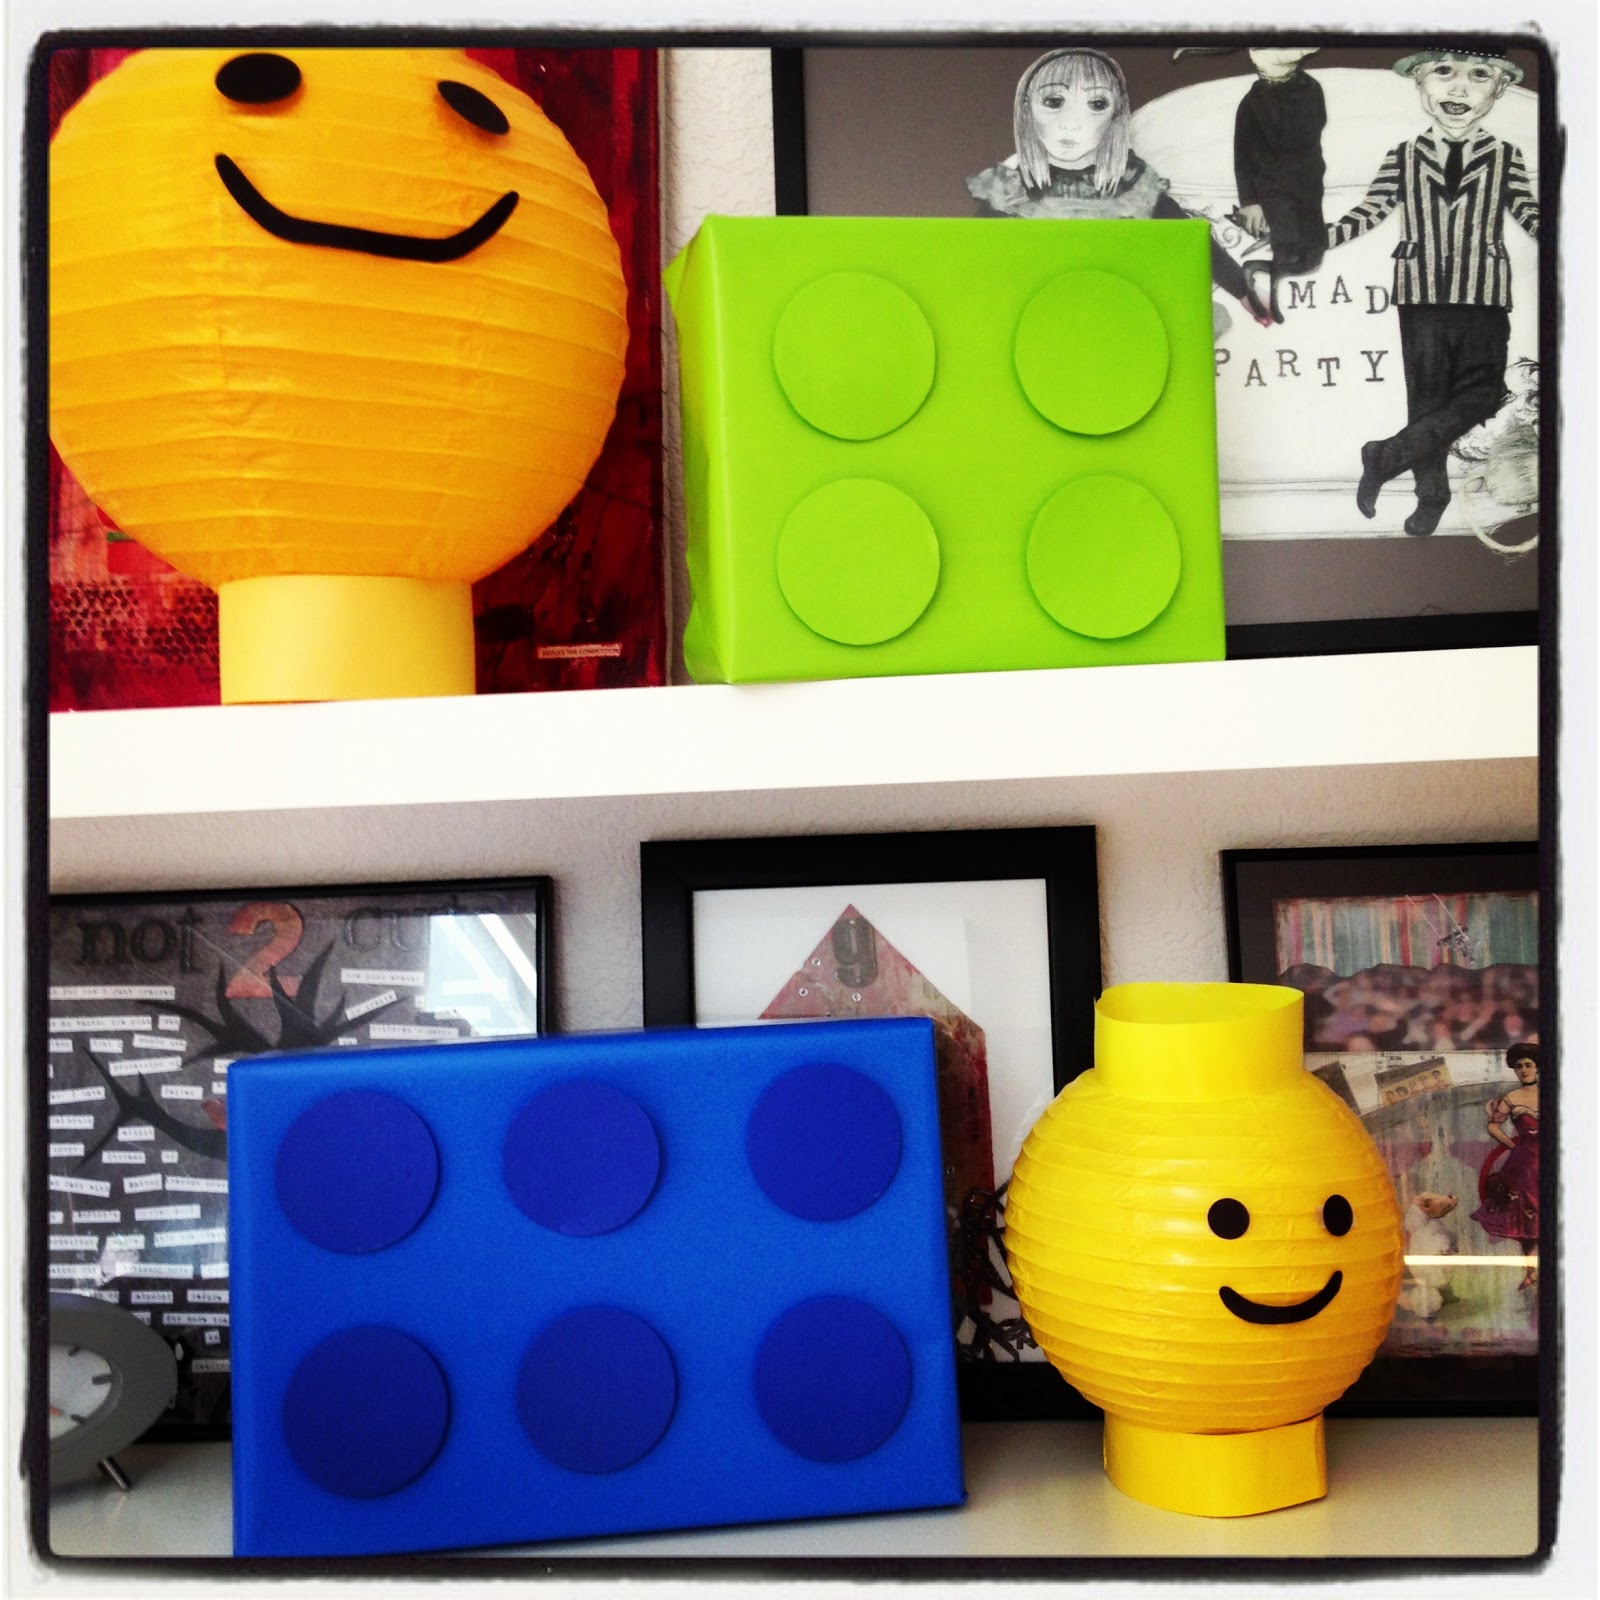
Since Amazon is my best friend, I had plenty of boxes to wrap like giant Legos. The mini figure heads were from paper lanterns found in the dollar spot at Target and spray painted yellow. I just taped the features on so I could remove them later and re-use the lanterns for the baby's "You are my sunshine" themed birthday in July.
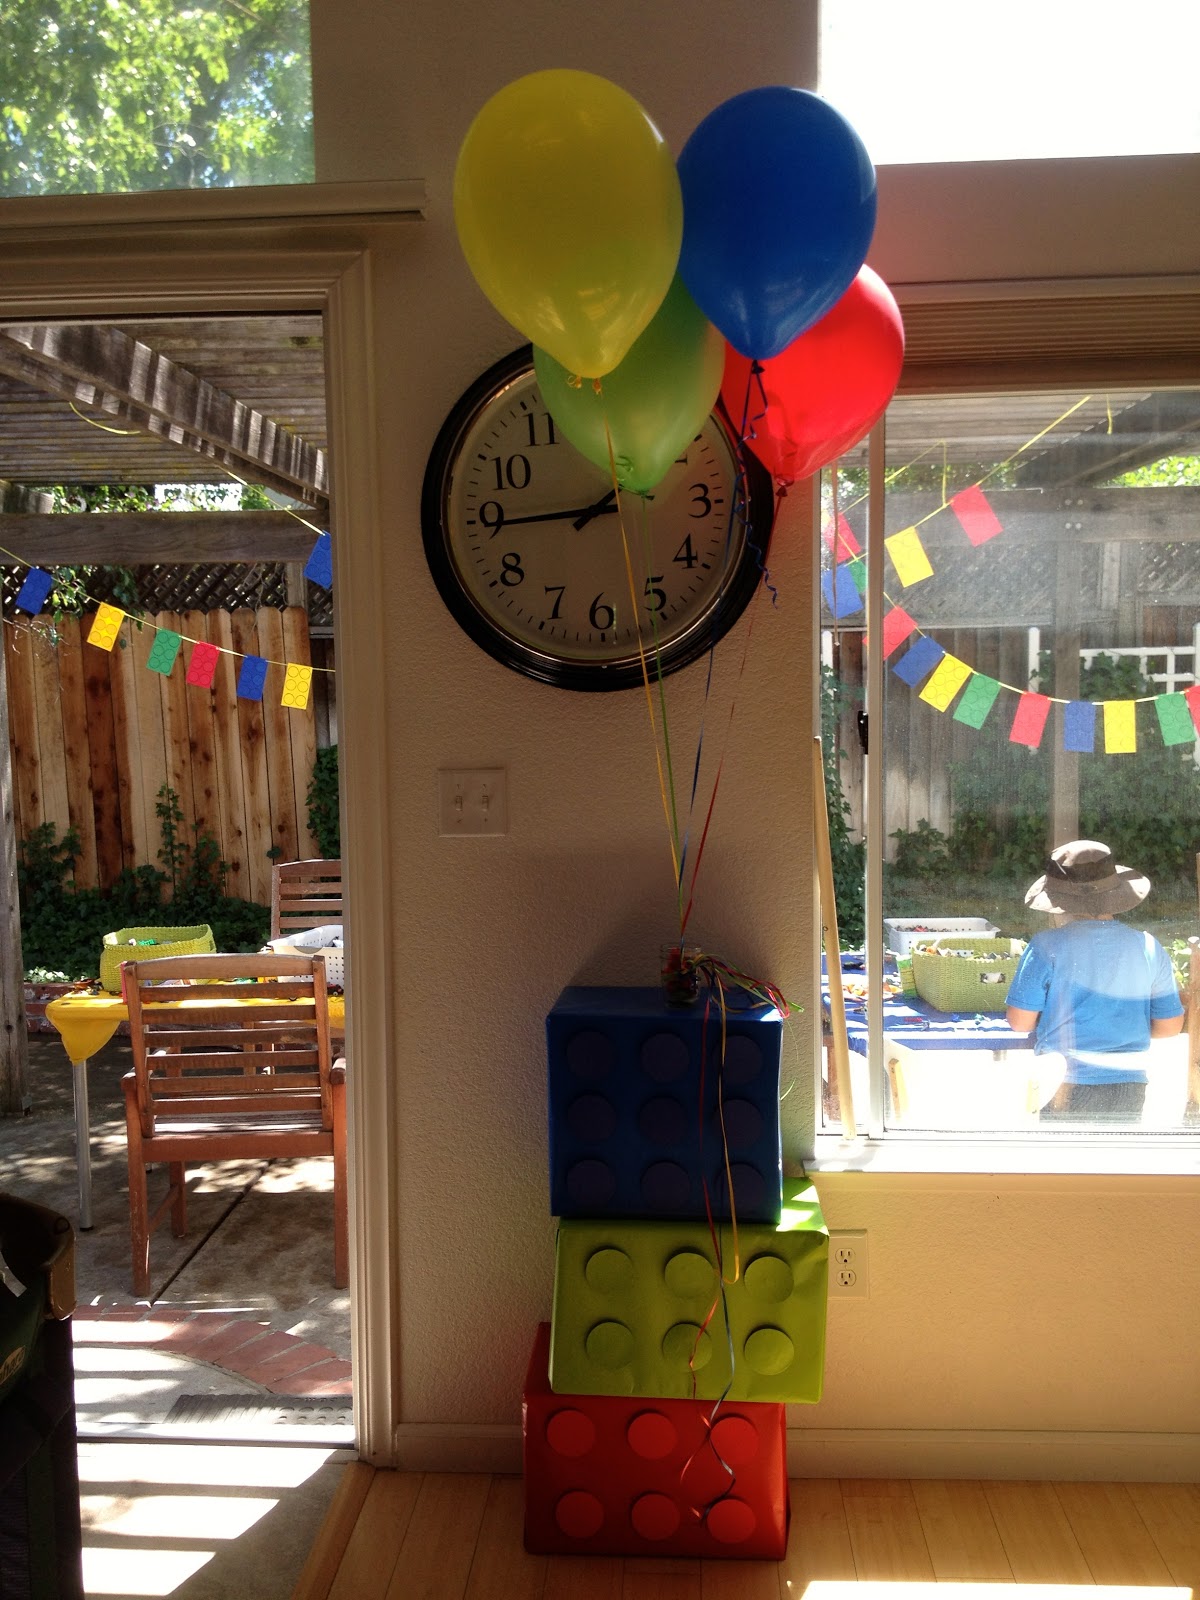
More giant Lego bricks and balloons that my AWESOME sister-in-law waited forty-five minutes to get! Who knew party stores had balloon traffic jams??
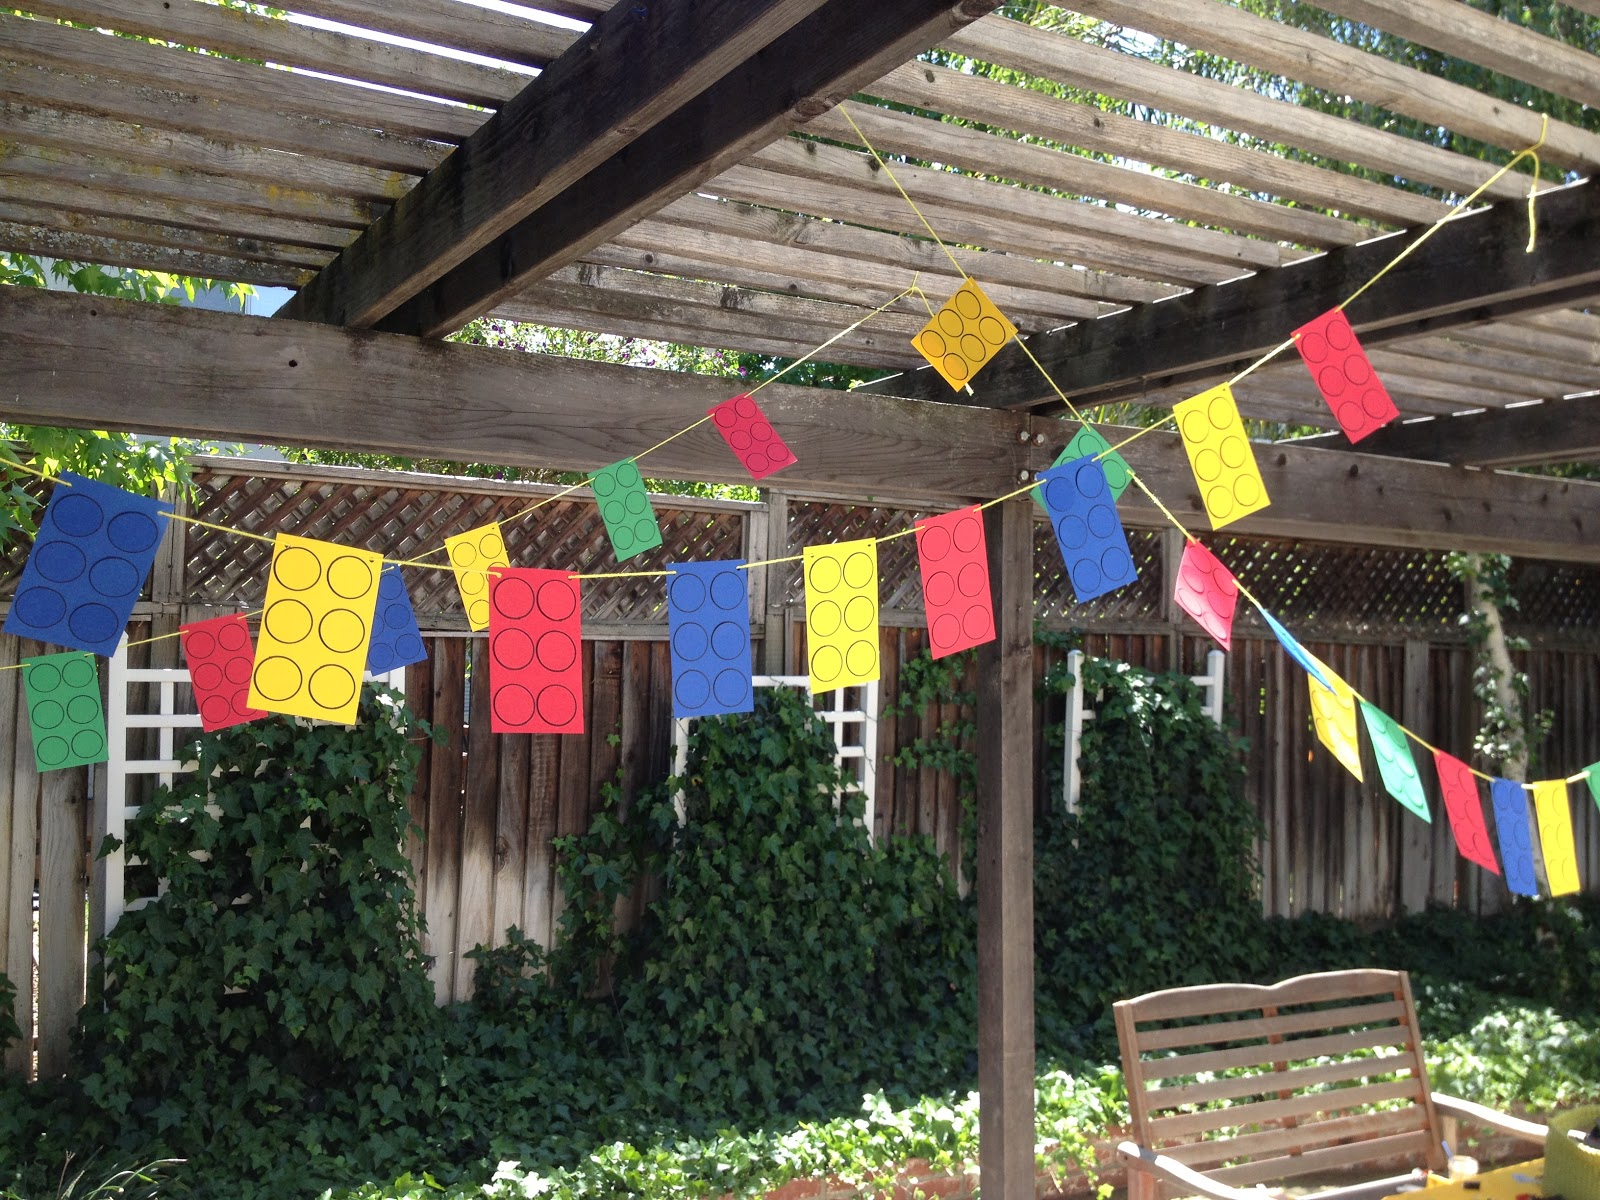
The birthday boy didn't want games, only building time, so we set up three large tables in the backyard and baskets of bricks. A simple cardstock brick banner and colored tablecloths were the only decorations.
Although the circles were punched and glued on, they didn't have enough dimension. Since I really didn't want to make a trip to the craft store for pop dots, I simply outlined the circles instead.
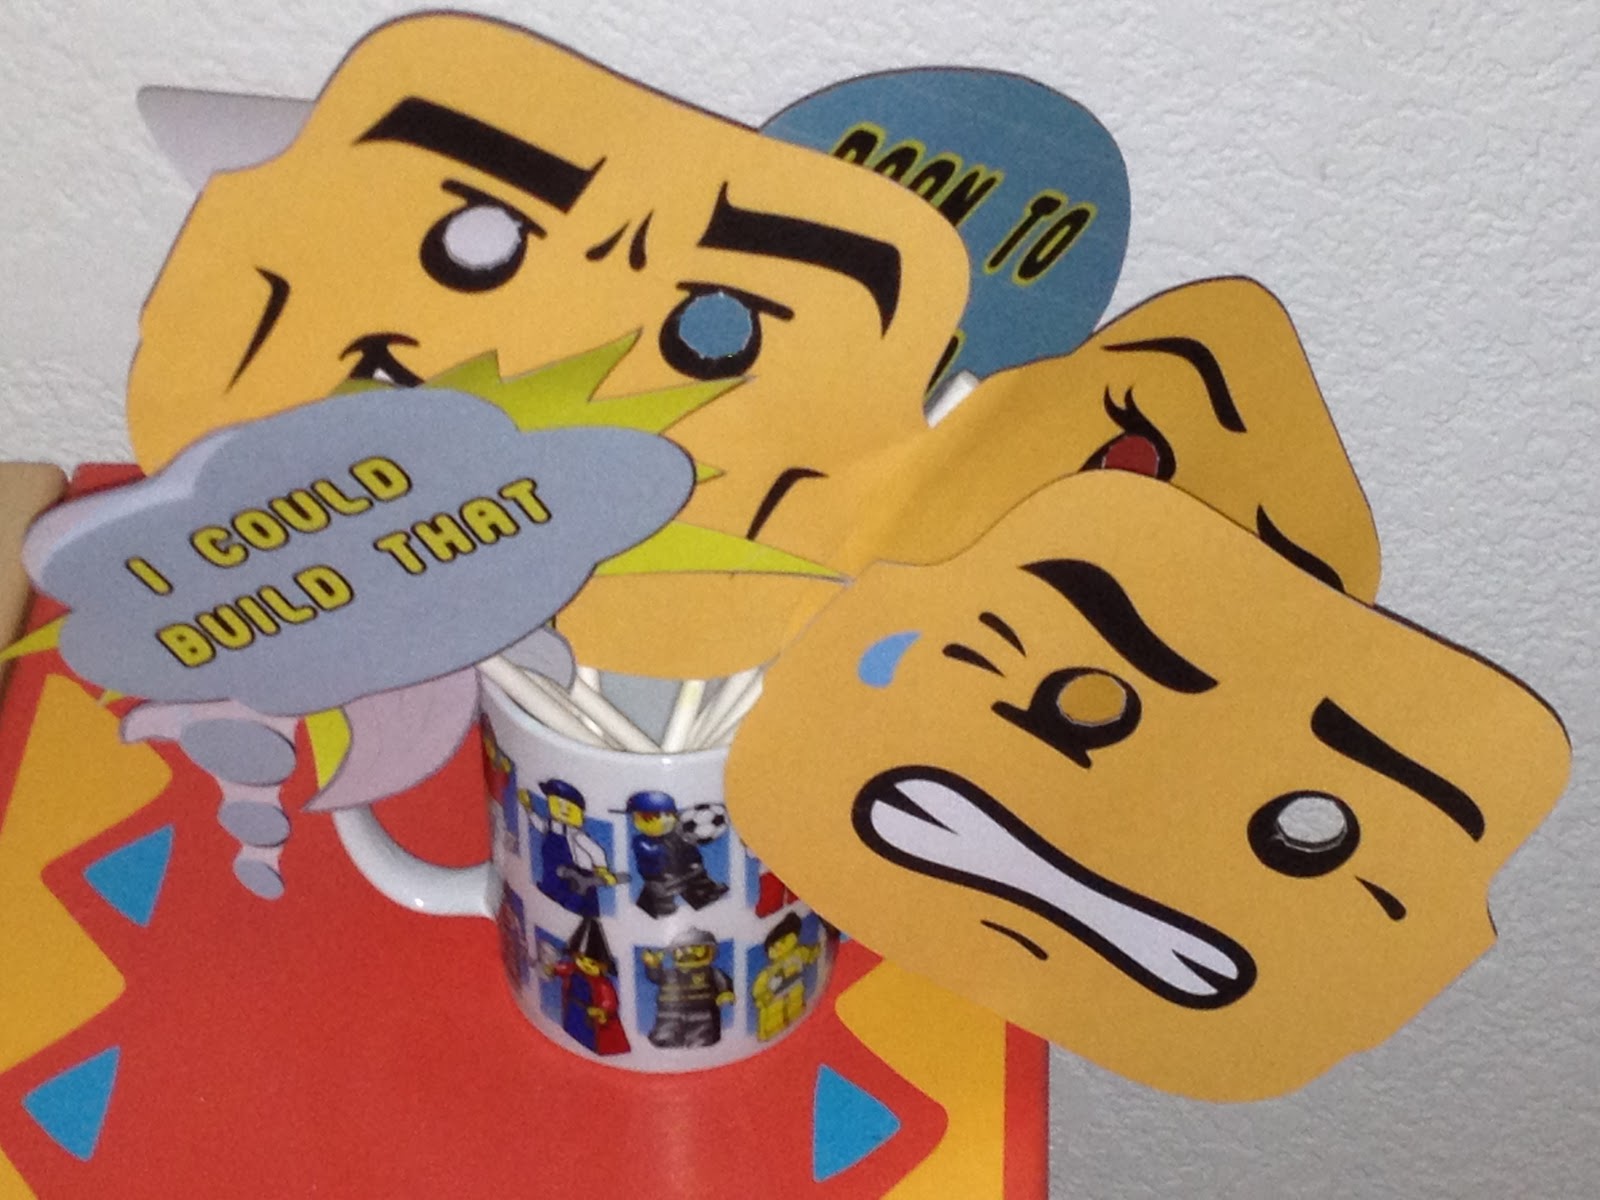
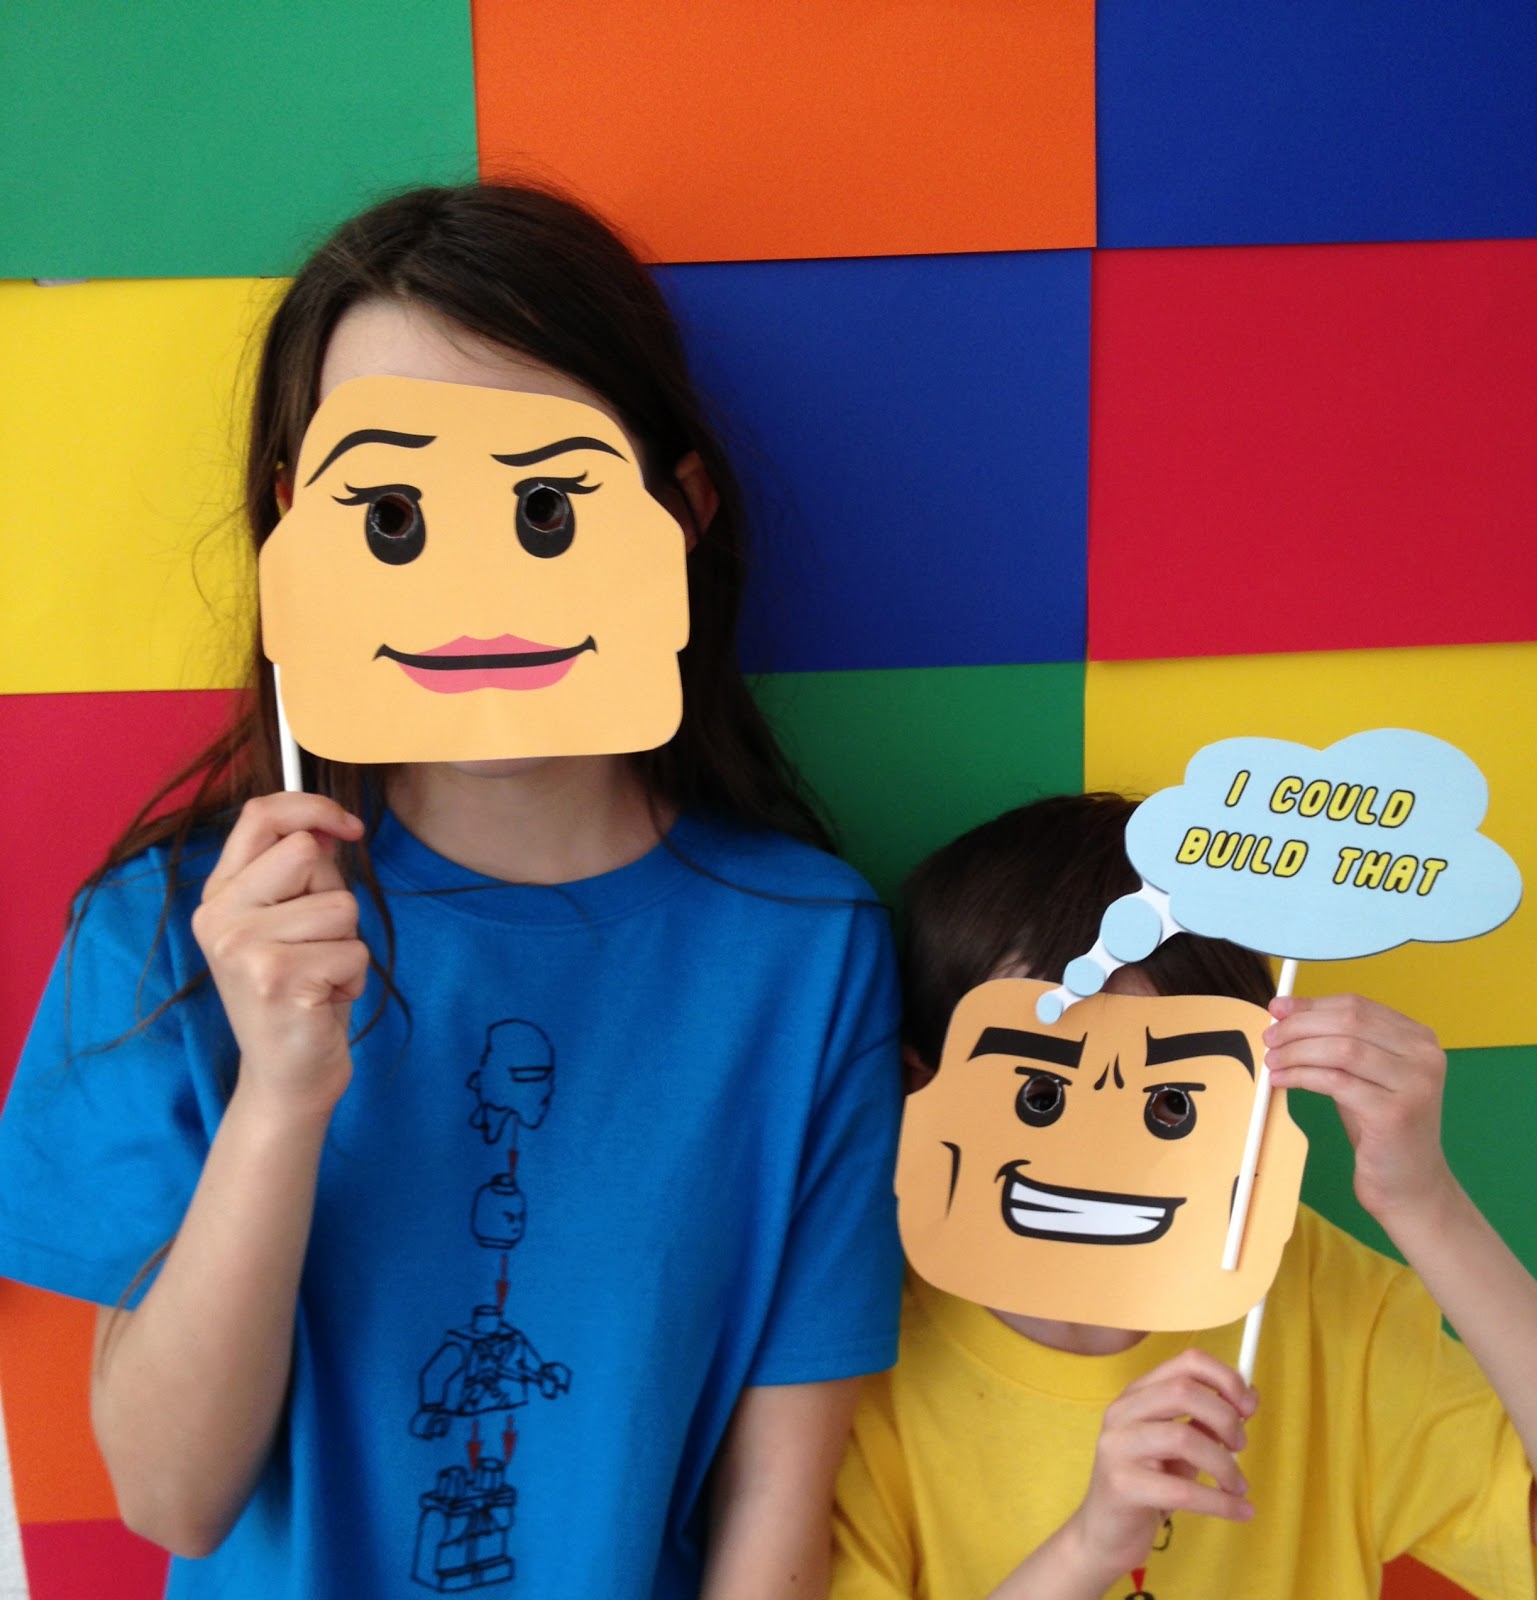
Cardstock again provided a backdrop for the party table. I used the extended area as a photo booth,
complete with props.
I think that may have been my favorite part.
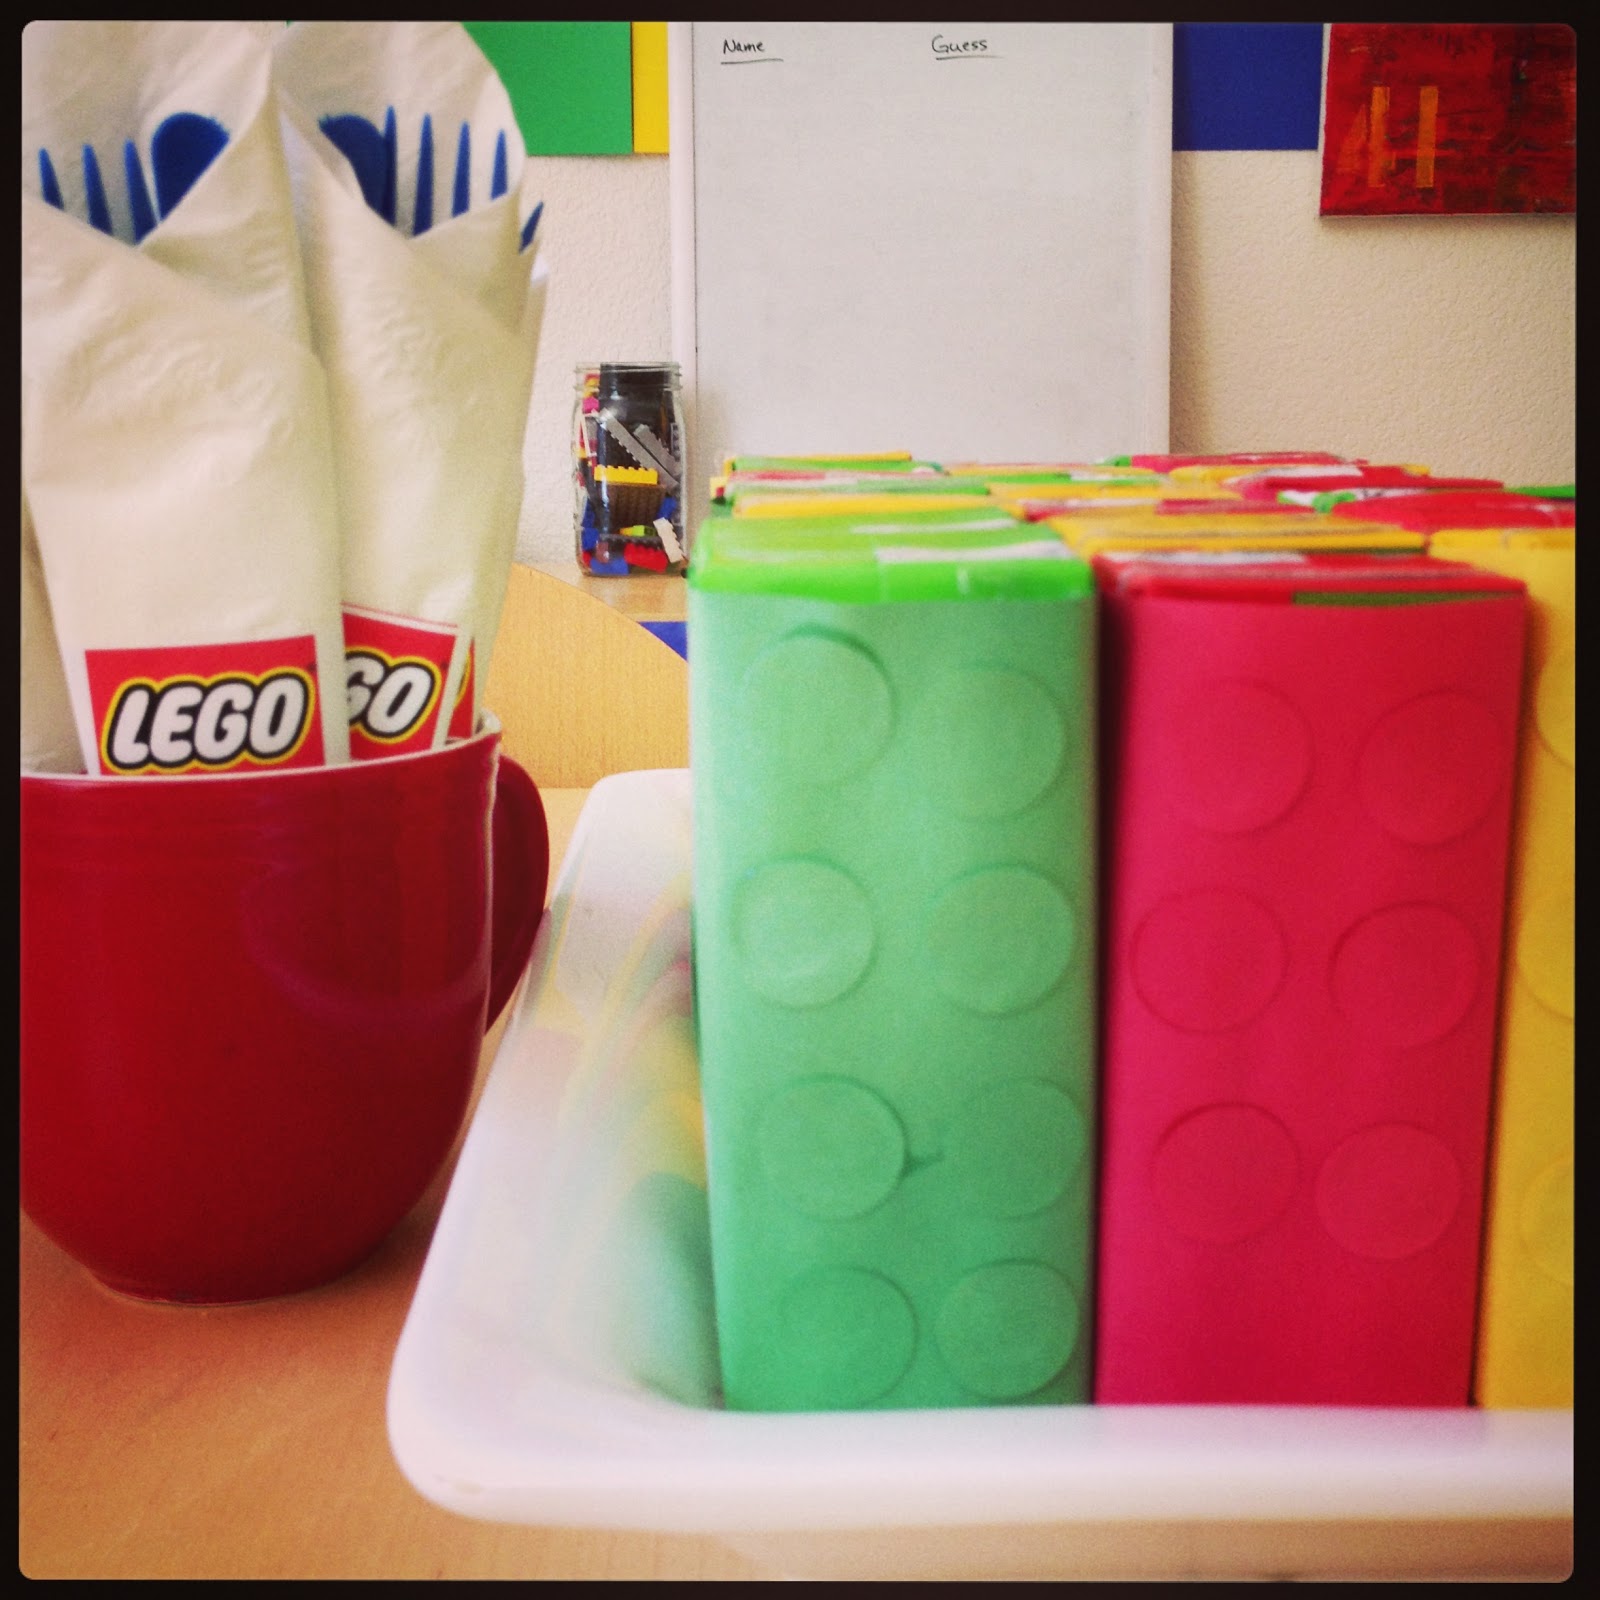
I was too busy getting out the food to take pictures of it, but prior to the party the kids helped me assemble Lego juice boxes and utensil holders. For the party I used the crock pot hotdogs and fruit in waffle cones from my Pinterest birthday board, and all were pleased. I will definitely use both for the baby's party - so easy to prepare ahead of time!
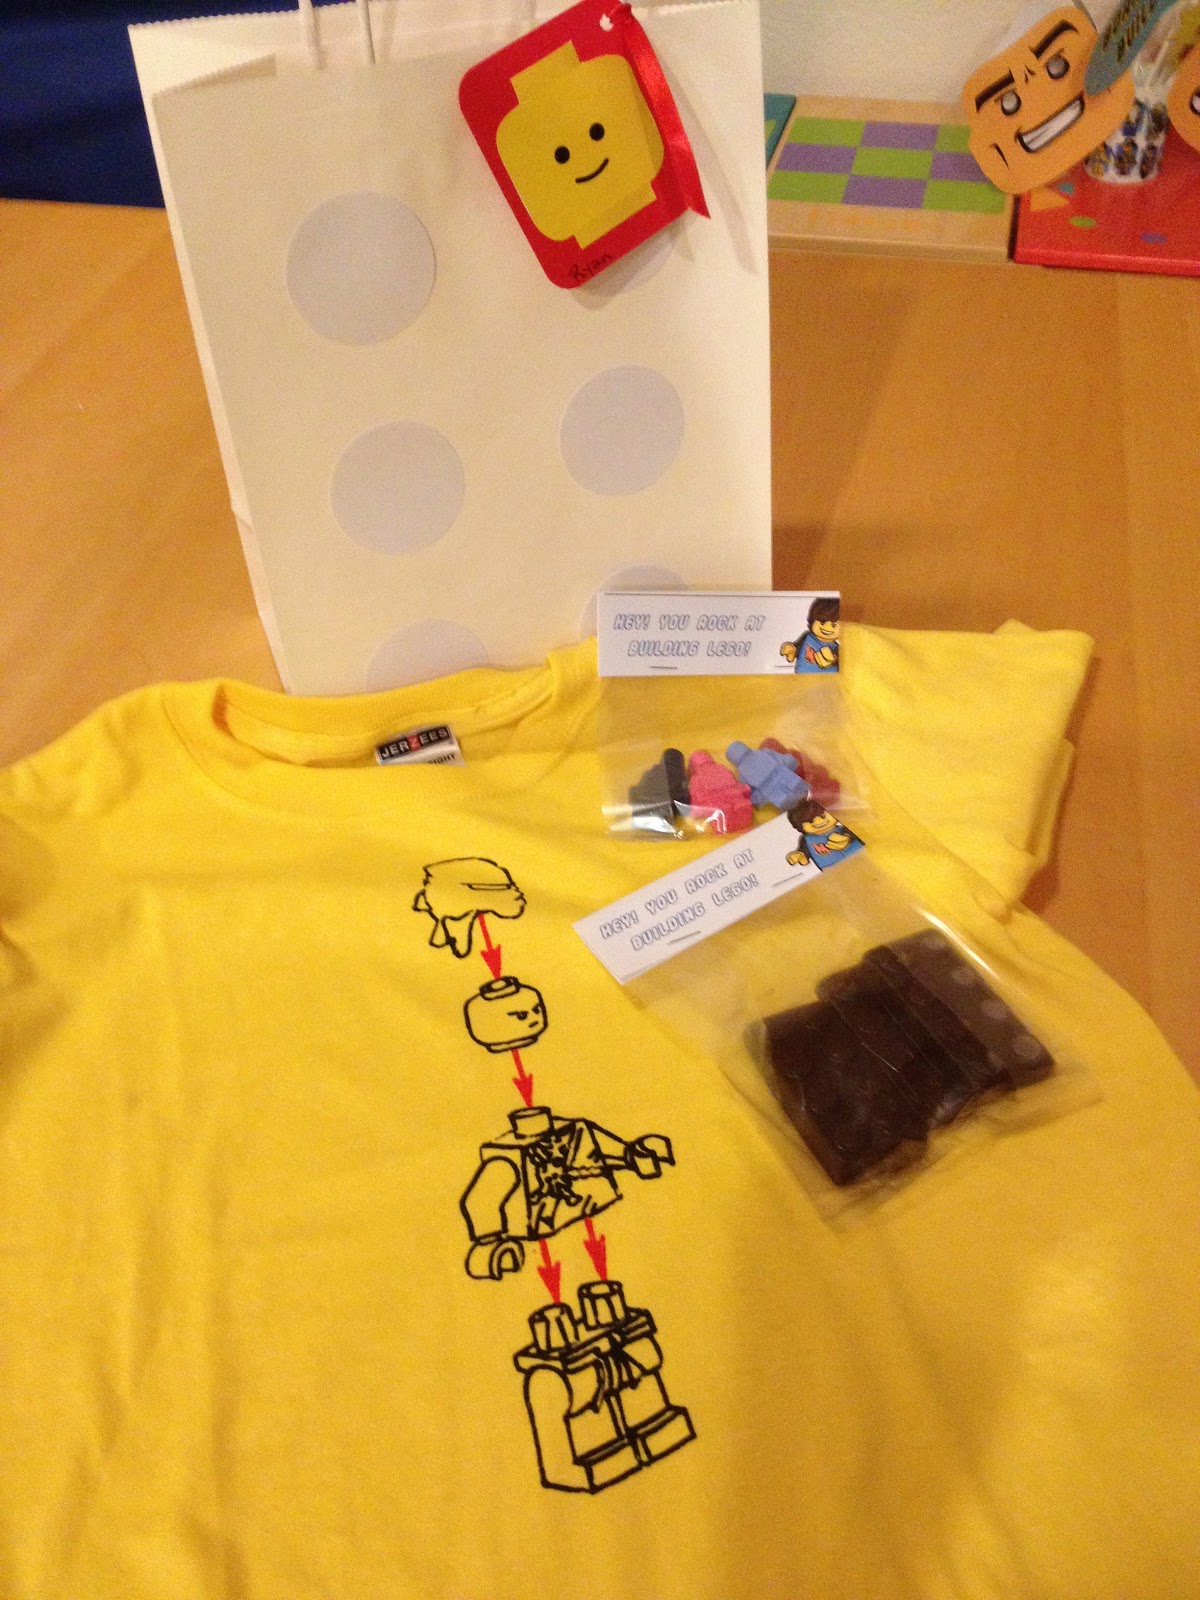
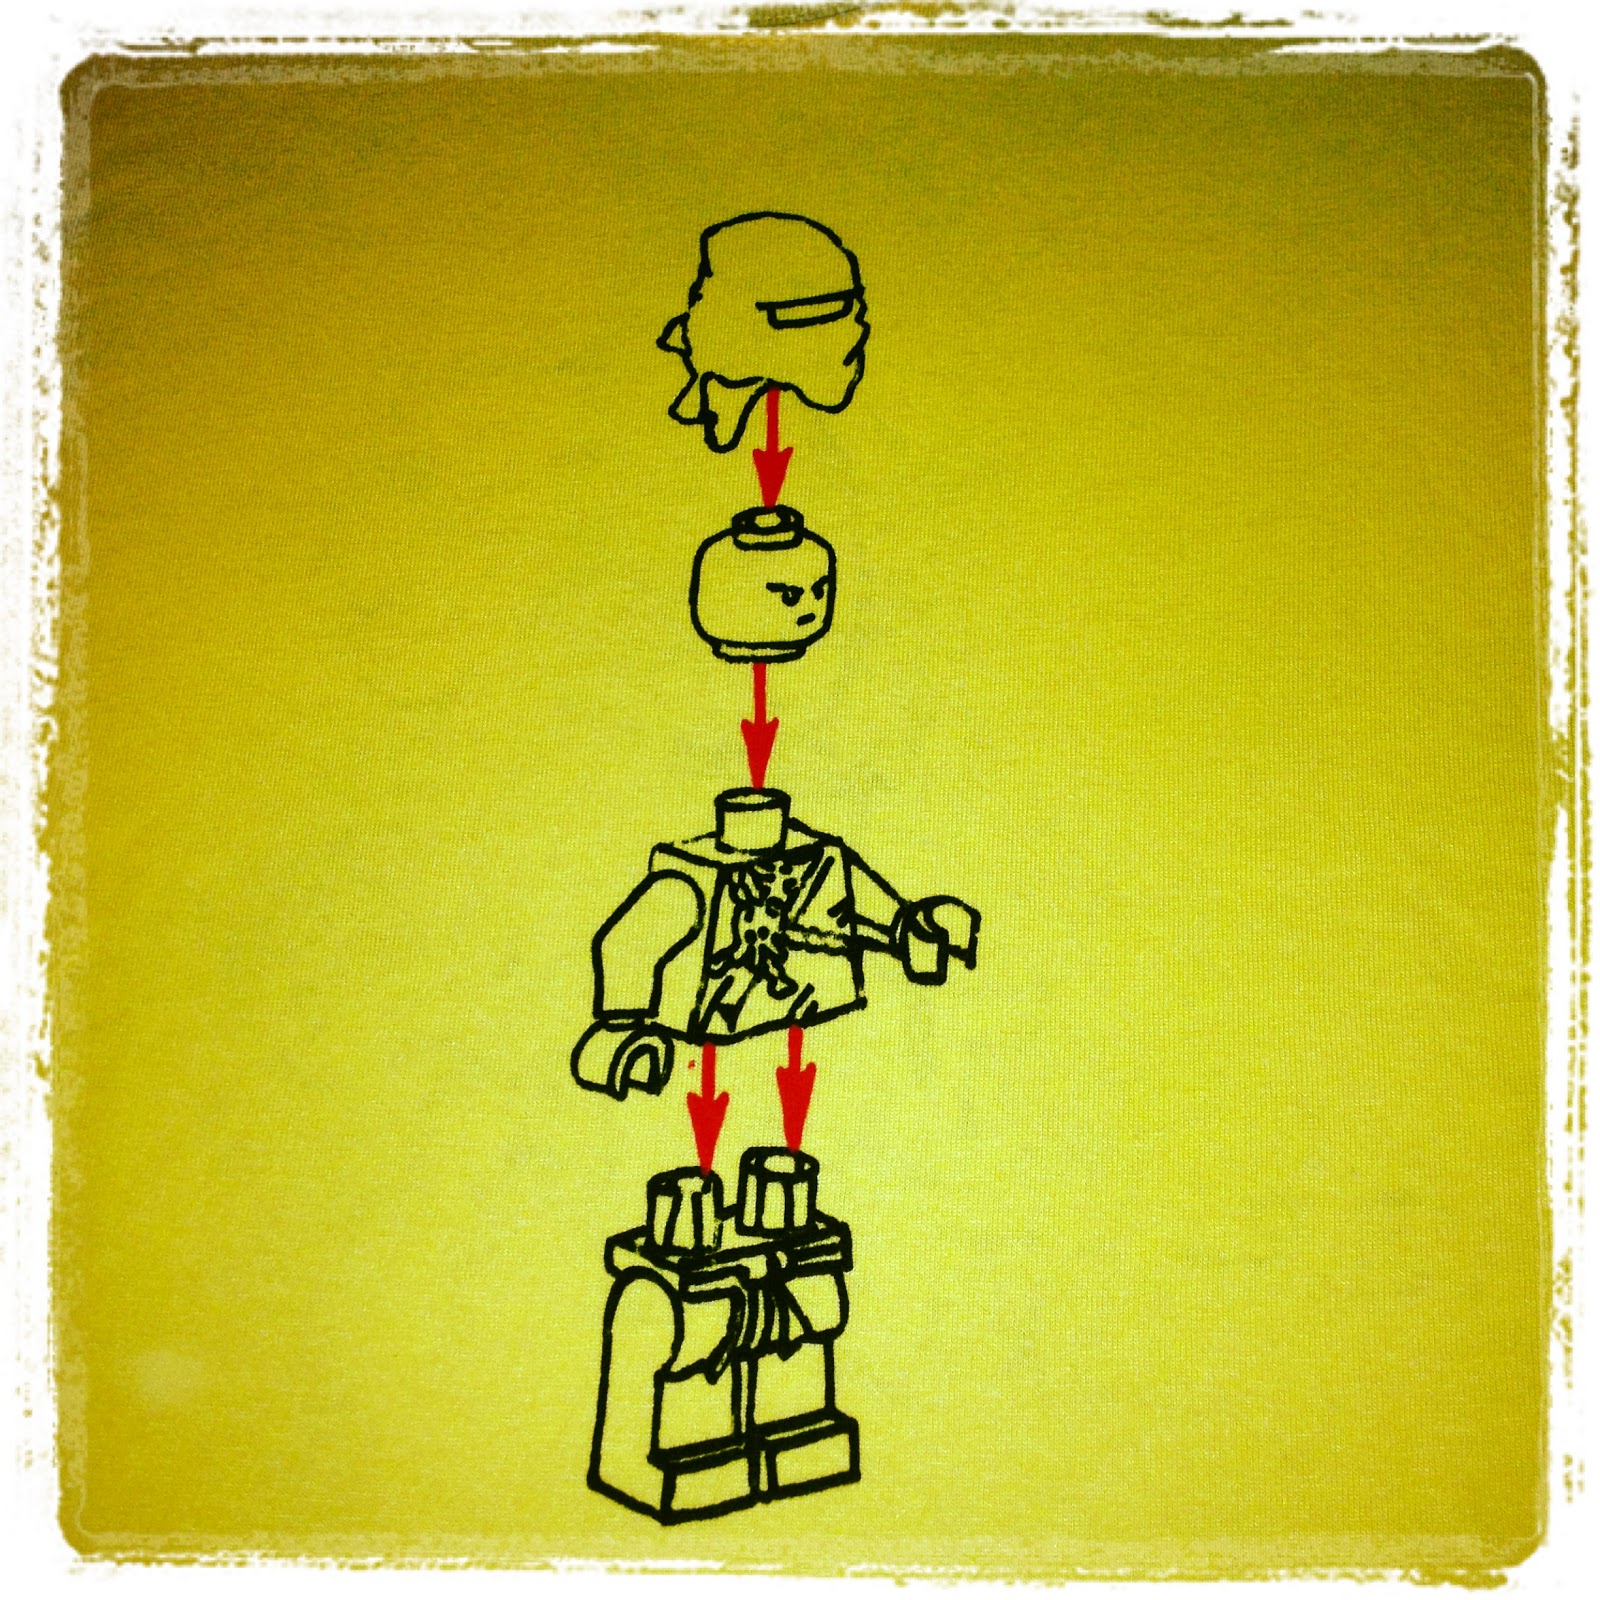
I loved all of the brightly colored Lego party bags on saw on Pinterest, but our Michaels only had the white bags in stock. Sigh. At least it made the tags pop. Inside the favor bags were Lego mini figure crayons and chocolate bricks (I found both of the molds on Amazon) and a mini figure t-shirt that I silkscreened from an image in one of his instruction booklets. I loved the way the shirts turned out!
T-shirts are one of my favorite party favors - they won't rot your teeth or break after three days!
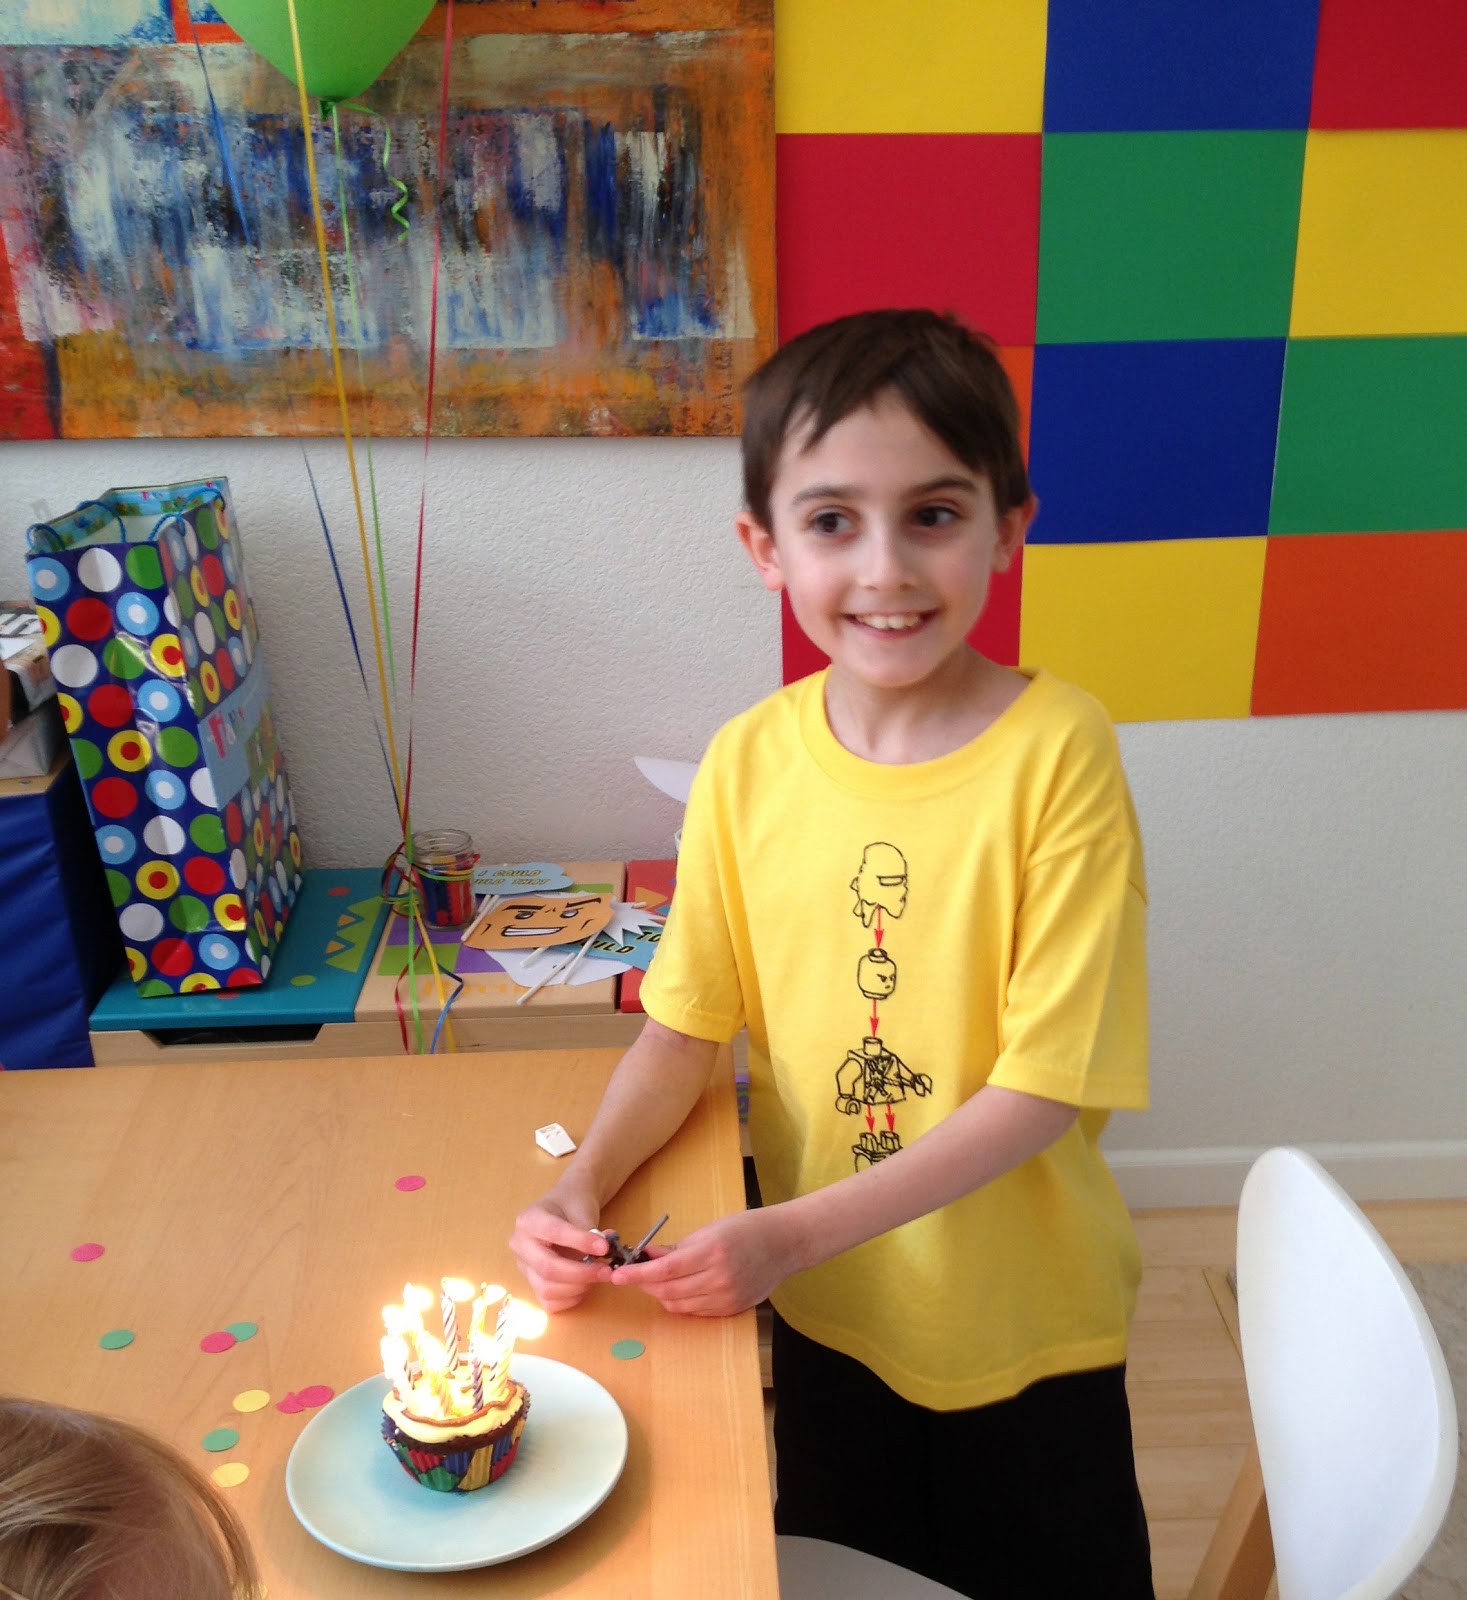
The boy was pleased, I think a good time was had by all, and I learned that it is never to early to begin planning. You can see my pins for the baby's birthday on my Pinterest board, too! Happy Birthday, big guy!

Thursday, April 11, 2013

Fluffy Mail


Something came in the mail last week...


my bummis diaper kit I won from one of my favorite blogs, Simple Kids!


And look what was inside!


The Dude helped me unpack...


and sampled the goods.


Look at all of this loot! Inside that big box were 18 organic pre-folds, four covers, fleece liners, flushable liners, a wet bag big enough for the diaper pail, and a sample of detergent and bottom cream! Holy cow, it was like Christmas! I have been using pocket diapers and fitted with covers, but I don't have a full set of pockets (around 10, I think) and the fitteds are larges, which are really too big for him right now. I haven't used prefolds in covers since he was a newborn, and wasn't sure if they would be enough for my big wetter. After they were prepped (you need to wash untreated cotton diapers three or four times to fluff the fibers), I couldn't believe how soft they were! I kept petting them, but could never convince my husband to fondle them, too. Go figure. But I must say that I have had no problems with leaks, and although I usually use pockets at night, I have used the bummis pre-fold with one microfiber insert and had no leaks in the morning.

I am impressed by the quality of both the bummis diapers and covers. They have made a velcro convert out of me. Usually, I find that velcro wears out fast and even with laundry tabs, gets stuck to everything in the wash. Three of the four covers in the box were velcro and so far have not stuck to anything except what they are supposed to, and since the Dude is not so laid back during changes anymore, the speed is a definite plus! In the box is also a little booklet about cloth diapering, with details about use and care. Repeatedly, the company urges you to call or email with any questions about use, washing, problems, or questions of any sort. It's an impressive level of customer service, and I think it would be very helpful to first time cloth diaper moms.

If you wash every other day, this one box really has everything you need. It was so much more than I expected, and I am so thankful to Simple Kids and bummis for this fabulous gift! I couldn't resist one more action shot, the Dude in bummis with the snap cover.