Thursday, December 8, 2011

December Bits

'Tis the season to be crazy busy, and this year has to be the craziest by far. Still, we've had some quiet winter moments:
Decorating the tree (the kids did it all this year!) and wrapping the advent Christmas books for an extra special surprise
Catching up with Santa at the Girl Scout Toy Drive
A dinner picnic by the Christmas tree watching Christmas videos
and painting sparkle snow pictures with friends. Just combine 2/3 cup Epsom Salts with 1/3 cup water, and paint on colored paper. It dries to a snowy sparkle! Wishing you a little holiday peace this week.

Monday, November 14, 2011

Candy Science

We don't eat much Halloween candy around here. First of all, Max can't eat any of it, and since I don't usually buy candy, the kids usually forget about eating it after Halloween. Instead, we do science projects with it. Last year, we made models of molecules, and this year we had two days of experiment mania. Most of our ideas came from the Candy Experiments website. We messed around with density (a huge hit), looking for the floating "s" from Skittles, tested for acid, and melted lots of different candies in the toaster oven.
Before we broke out the beakers I had the kids sort their candies and record the data, then decide on broader categories to put them in and graph the results. Who knew you could get so many lessons from Halloween treats?

Sunday, October 16, 2011

Museum Scavenger Hunt Book

We have several museum trips coming up, thanks to free and reduced homeschool days, and I love using scavenger hunts to help focus the kids' energy when we are there. However, I do not love carrying a clipboard around, or trying to write against a wall or knee, or searching through the backpack for a pen. My solution? A book! I printed pre-made scavenger hunts from the Monterey Bay Aquarium website (many museums have them listed under the teacher resources, or you could make them yourself from pictures from the website) and bound them in a sturdy chipboard book, sort of following Angry Chicken's directions here. Instead of stapling the pages together, I folded each page in half and glued them back to back. Then I glued the first and last pages to the covers which made end pages and at the same time, secures all of the pages to the book.
This allowed the whole page to fold down for viewing, and the floating spine enables you to fold the whole book backwards. The hard chipboard covers (I took mine from the back of a sketchpad) provide a perfect surface for writing.
To keep track of the elusive pen, I added an elastic loop between the back page and the cover. To add extra hold insurance, I glued it down and then covered the edge with gaffer's tape.
That's all there is to it! Now I have a pint sized book of fun to focus our attention and our energy, and maybe discover something we hadn't noticed before. Now if I could only make our lunch bags and water bottles pint sized...

Wednesday, September 21, 2011

Thursday, September 8, 2011

Mystery Box

My new comprehension tool - the mystery box. This is slightly different from the learning kits I have been putting together, as you can change this one from day to day.
I used an old Math U See box and painted the top with chalkboard paint.
I filled the inside with items related to the Phoenicians, the section we were about to read in our history book. I had the kids inspect the items, and told them they needed to figure out how they related to the Phoenicians. This made them listen closely to the chapter, then use their critical thinking skills to figure out how the items were connected to the passage. It also helped my visual learner process the information in the book. The best part is that I can erase the title, fill it with something else, and use it again tomorrow!

Saturday, September 3, 2011

Egg Carton Creations

What do you do when you have too many egg cartons lying around? You make egg carton sculptures of the Nightmare Before Christmas characters, of course. I had plenty of other things I should have done today, but, well, this was Fun!
Hmmmm... what else could I create? I sense a challenge in this...


Monday, August 22, 2011

Geology Learning Kit


Learning kit number two - the geology basket. We are studying geology along with space, and we like to get hands-on with our work. I used a recycled basket (once the home to Numi teas), and added an extra clasp and handle to make it more portable. The handle is simply a corrugated cardboard  tube with raffia threaded through and tied on the underside of the lid.  A button and cord provided extra security to the front of the basket.
I gathered materials we had around the house for supplies. I included a magnifying glass, rock guide, notebook, pencils, colored pencils, a sharpener and eraser, small tape measure, paint brushes and a specimen box (i.e. recycled scrapbooking flower tin). It's easy to take outside for a little backyard geology, and while I don't tote it on hikes, it's nice to have it all in one place so I can throw the supplies in my backpack as we head out the door.
Science on the go
Time to take a hike!

Monday, August 15, 2011

Solar System in a Cylinder

I was browsing the Playful Learning and Imagine Childhood websites this weekend, and their products reminded me how much I love kits. The passion started early, when I would walk into those Sanrio mall stores and salivate over the little boxes filled with Hello Kitty stationary, stickers, and miniature pencils. Years later, I loved walking the aisles of Papyrus, lingering over the beautifully packaged cards and wrappings. Oh, and gift baskets, with all of those special little treats all bedecked with ribbons? Sigh.

Educational kits are fabulous, but often expensive. Why not make them myself? I could tailor them to what we are studying this year, use up some of those craft supplies that seem to breed in our home, and maybe motivate the kids in the process? Introducing....
Yes, the entire solar system in a can. Actually, it's a bunch of wool roving in a decorated coffee can. I chose bits of roving in colors to match the planets, then packaged each in a baggie (to protect it from the coffee smell that still filled the inside of the canister). The kids first had to decide which baggie was which planet (with the help of a book we read on the solar system), and then we tried turning the wool into felted balls. We used a You Tube tutorial at first, but it didn't go so well. Darling son said the wool made his hands itch and promptly left the activity. Considering he's allergic to everything, I didn't argue. Then I recalled that Amanda Soule had a tutorial in The Creative Family. I knew it would be kid friendly and easy, and it was. We used the kitchen sink instead of bowls outside (it was ninety degrees, after all), but the balls came together much better. I highly recommend the book, by the way. It's full of great projects and packed with good old fashioned inspiration.

Interest lasted for about two balls (it is time consuming), so I ended up doing the rest. I loved the process - very meditative. We set them outside to dry:
The kids have checked on them several times now, and are more excited about putting together a mobile with them when they are done. I haven't decided what to make the rings out of yet. Felt? Colored wire? I'll probably let the kids have the final say. Overall, they enjoyed most of it. I liked using up some supplies and having a project wrapped and ready to go. I have one other kit done that I will share next week, and more in the planning stages. Maybe I need to make a few adult ones as well. Who says that kids are the only ones allowed to have fun?


Monday, August 8, 2011

An Art Gratitude Journal


Homeschool started today, and with it a new routine for all three of us - the art gratitude journal.  The plan is that each day we will journal to a quote from this book:
a wonderful collection, by season, of quotes relating to gratitude and peace. There are religious quotes from all world faiths, as well as secular quotes. I bought it last year after seeing it on my moment of Zen blog, SouleMama. I decided to have the quotes pre-written for the kids, so they could just glue them in and focus on the art. With Madeline's motor issues and Max's distaste for writing (unfortunately cultivated during first grade at public school, where benchmarks dictate paragraph writing for six and seven year old's, despite the developmental inappropriateness of it), I wanted them to see this as a joyful exploration, not an assignment. Here are their results:
Max bought a rainbow colored pencil at the HSC (Home School association of California) conference Saturday, and was busily experimenting with what it could do. Madeline produced her page and two more before we moved on. I was stumped at first, trying to decide what I would do with my page, when I saw Piggy on the table. If you know my son, then you know Piggy. Piggy has been his constant companion for the last six years. He has lost one ear and his tail, and the second ear is a tangle of threads. He was once a lovely peach color, but now is essentially gray. But he has provided so much comfort over the years, and so much love, that he really is a figure of grace.

Yes, we have found a new morning routine.

Sunday, July 31, 2011

The Last Remaining Days

I know many of you are in the thick of summer still, with a month of lazy mornings and hot days ahead. We still have the hot days, but my students come back to school on Tuesday, and our homeschool begins next week. I have a stack of sewing projects in the works, and new t-shirt designs, so once the craziness of the new school year has settled, I'll get some of those on board. I  might even get up a few drawings from my garden journal. Yah buddy, I don't want it to end, either!

Tuesday, July 12, 2011

The Best Gluten Free Waffles (really!)

Breakfast is our favorite meal; we like it so much, we not only have it every morning, we also have it on Friday evenings! We call it backwards night, and it evolved when pizza Fridays became less desirable after going both gluten and dairy free. Our favorite breakfast food? Waffles, of course! It took a lot of tinkering to come up with a recipe that was both gluten and dairy free but tasted like a normal waffle. We make this recipe so often that I keep a mix of the flours in a jar in the pantry, speeding up the whole baking process. Want to try it?

Mix:
3 cups white rice flour
1 1/2 cups brown rice flour
3/4 cups corn flour
3/4 cup tapioca flour

Ingredients:
3 eggs, separated
1 3/4 cups rice or coconut milk (or soy, or almond, or even the real thing)
4 TBS. melted Earth Balance spread
1 TB baking powder (make sure it says gluten free!)
1 TB sugar
pinch of salt

Directions:
Beat the egg whites. While they are beating, combine 2 cups mix with the ingredients listed above (yes, include the yolks). Gently fold in the egg whites. Spoon into hot waffle iron and bake until golden and crispy on the outside.

I have found that rice milk makes a thinner, crisper waffle and coconut milk makes a softer, fluffier one. I like them both. I have not used the other milks, since we are allergic to them, but I'm sure they would work just as well. these taste so much like a wheat based waffle, if you fed them to your family without telling them, they would never know the difference! I have tried many other recipes, some with a higher ratio of more protein or fiber filled flours, but they would usually come out heavy, or with that particular gluten free flour after taste. Not this one! If you try it, I'd love to hear what you think!

Thursday, July 7, 2011

Easiest Summer Dress

I have actually managed to do a little sewing for myself this summer, all my style - fast and easy. This sundress was made in the same fashion as the one I made for Madeline here.  The beauty of this little number was no hemming! The seersucker had finished selvedges, so I simply used those for the top and bottom, and seamed the cut edges in the back. Before seaming, I used elastic thread to gather the top, and also used it to make the stretchy straps.
It is a long dress, perfect for hot summer afternoons. The gathering took the greatest chunk of time (I think I did 16 rows), and the rest came together is minutes, giving me plenty of time to read and relax in the shade. That's my kind of summer project.

Monday, June 27, 2011

Puppets!


I have a tradition of making something for my goddaughter's birthday. It has been clothes in the past, but this year I decided to do something a little different - puppets! Although my own kids were only mildly interested in puppets, I have great memories of my own puppet theater, and the time I spent making up stories and performing shows. My little goddaughter is a bundle of energy and is a natural performer, so I thought she might enjoy a little dramatic play. 


The puppets are simple felt creations, with the clothes and details sewed by hand on the top piece, and then the front and back were machine stitched.
The eyes and mouths were embroidered. I took a general fairytale theme, but tried to make the puppets simple enough to be used in a variety of stories.
I think Red is my favorite, but when she was removed from the bag, her brother exclaimed that she looked like a ketchup bottle! I just had to laugh, because she does, really. Inside the drawstring bag is also a portable theater; simply a tension rod that fits in a doorway, with a simple curtain made out of the same princess canvas as the bag. It's easy to put up, easy to take down, and everything (plus any extra puppets of her own) fits inside the drawstring bag.


Monday, June 20, 2011

Upcycled Picnic Blanket

I love vintage table cloths, but this one my mother gave me really didn't match any of the colors in the house, especially in the dining room. So I pulled out an old cotton mattress cover I had been saving, and used it for the backing. It was already lined with batting, so I simply pinned right sides together and seamed it. I top stitched around the edges, but did not quilt the top.
It adds a nice little cushioning for a summer lunchtime picnic!

Friday, June 3, 2011

Dried Cherries

We went cherry picking earlier this week, and brought home over 10 pounds! Three days later we are down to less than half that amount, but some of that box ended up in my dehydrator. I invested in one last summer, since Max is so limited in his snack choices, and now is the season it seems to keep a permanent place on my counter. I own this stacking tray style, and it has worked just fine. Some day I might trade up for an Excalibur, but at the time I wasn't interested in spending that much money.

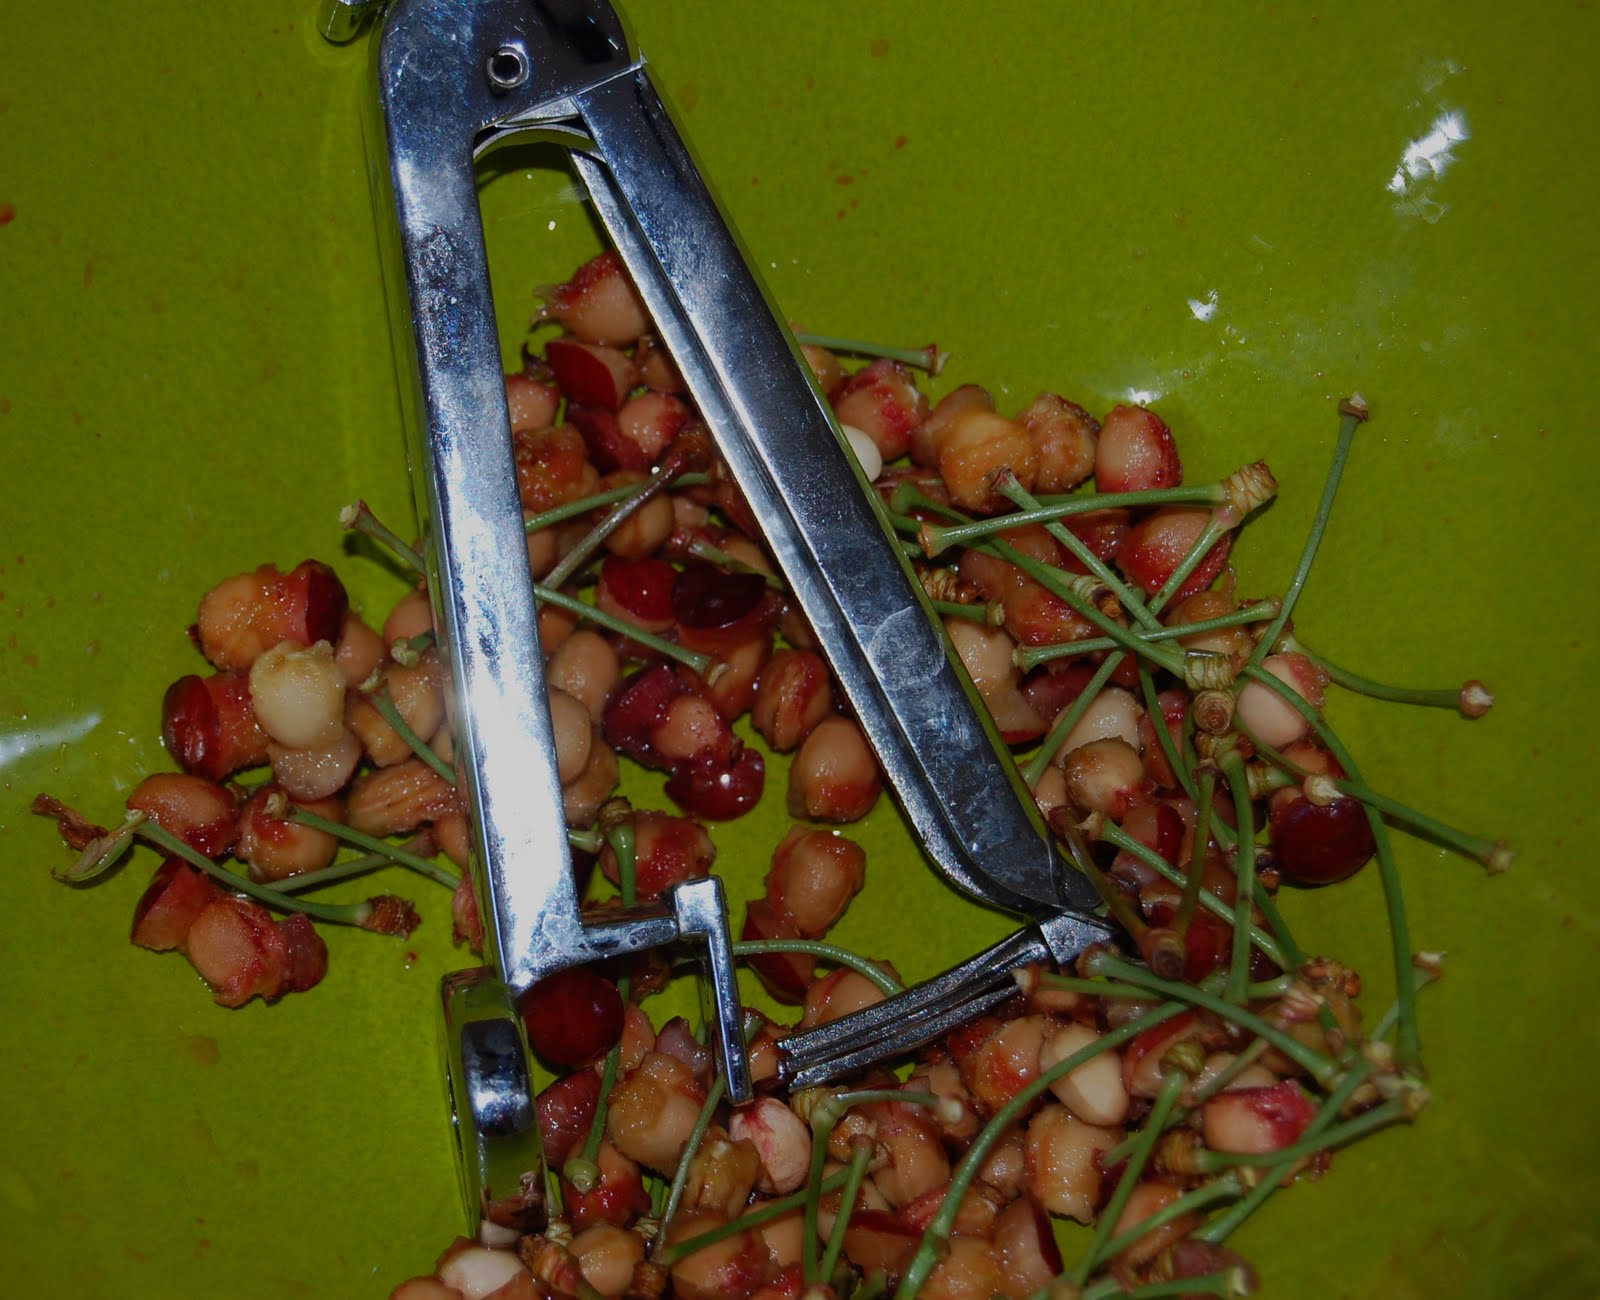
If you are going to dry cherries (or cook with them, for that matter), you need a cherry pitter. I think I spent $12 on mine, and it was well worth the money! Of course, if you are going to dry cherries, you need to pit them, first. I like to do this at the table with a movie playing  on the iPad. It's repetitive work, my friends.

When you are done, you'll have a nice big bowl of pits.
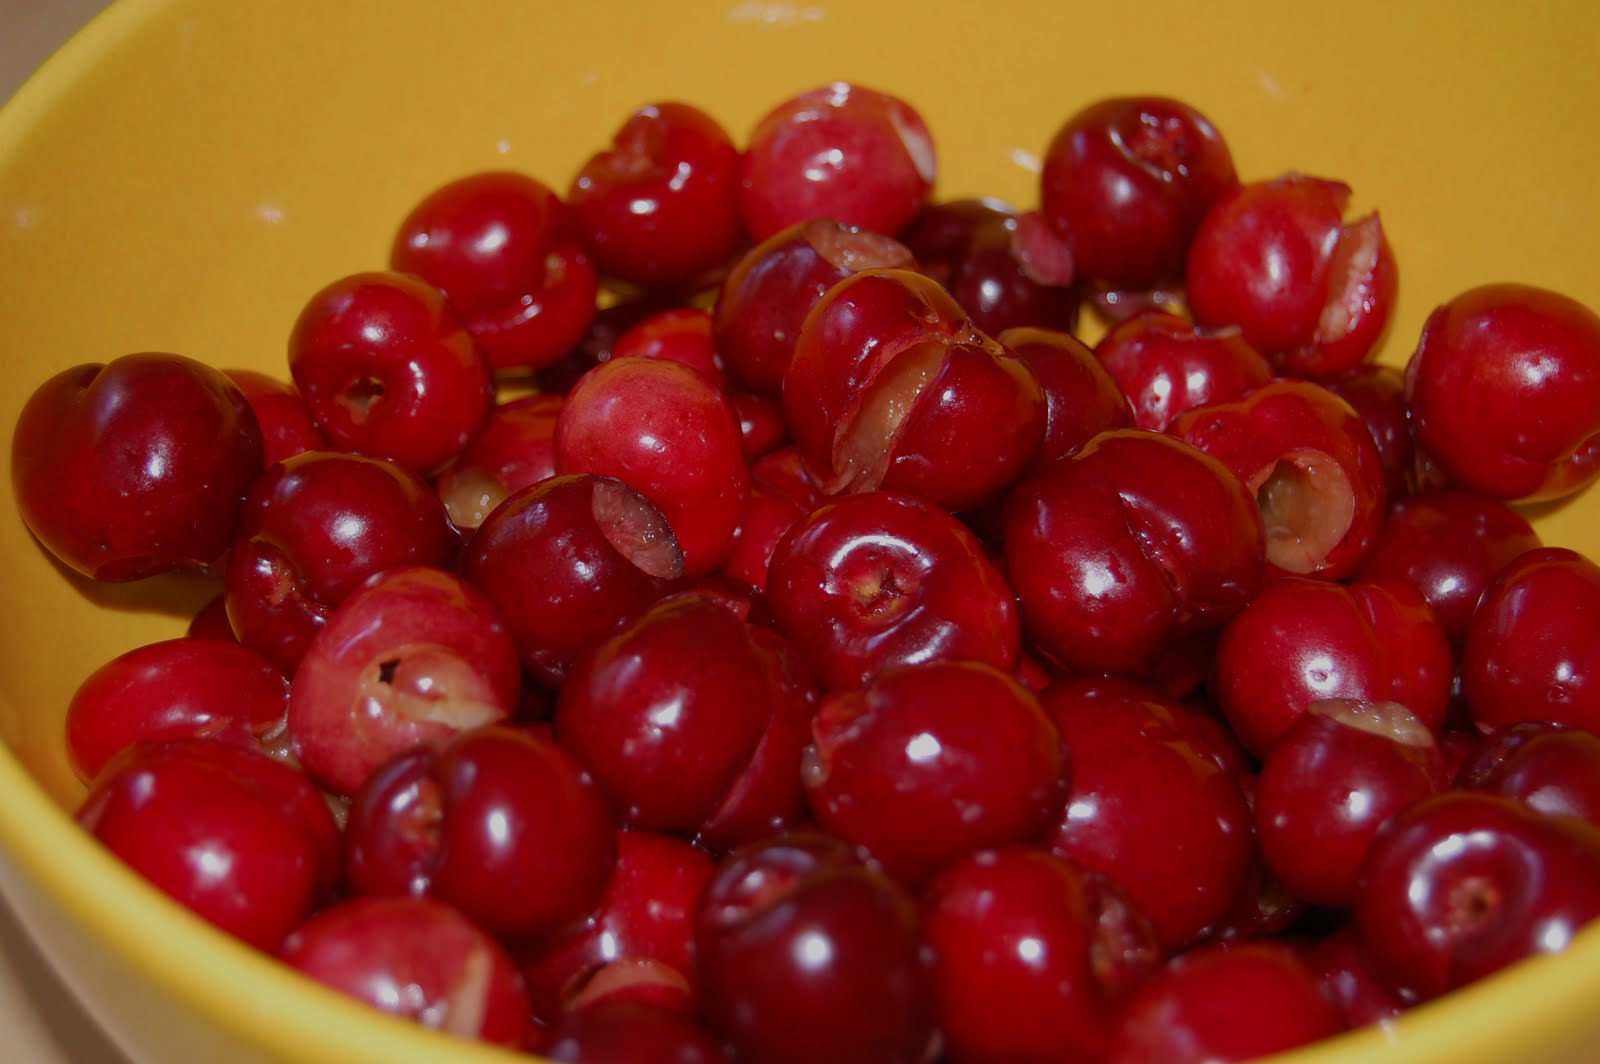
And a big bowl of pitted cherries! You will need to cut them in half for drying, but since the pitting tends to split them a bit, I find it easiest to just tear them with my hands.
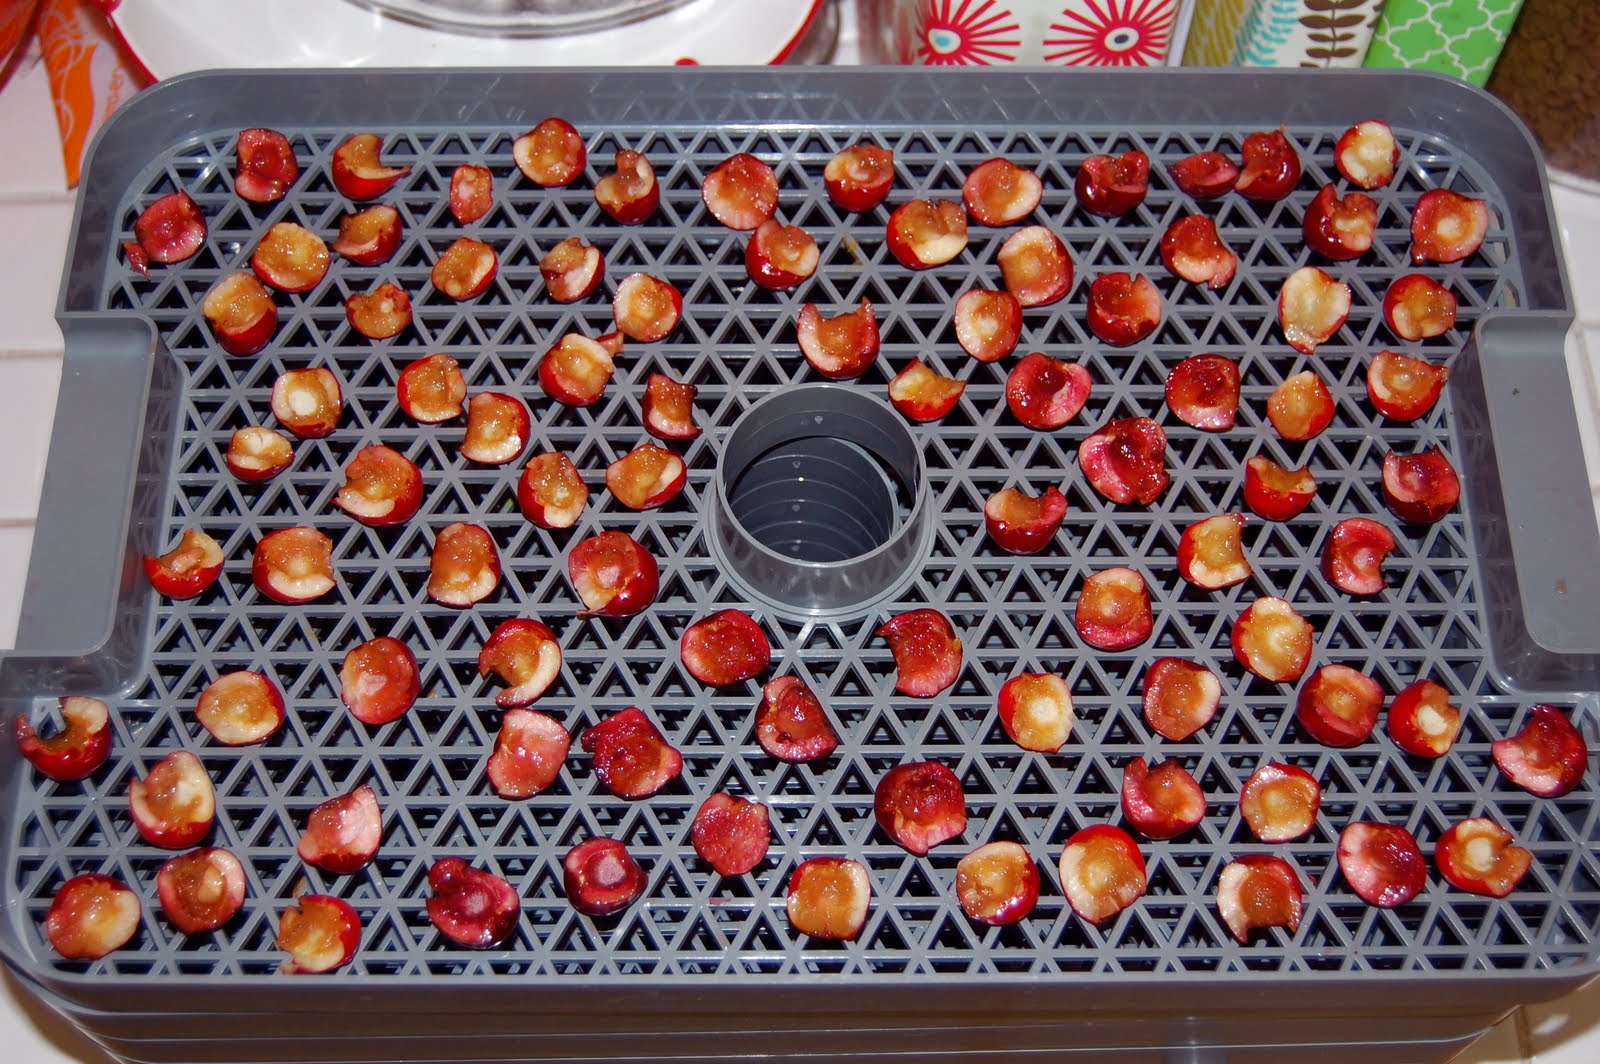
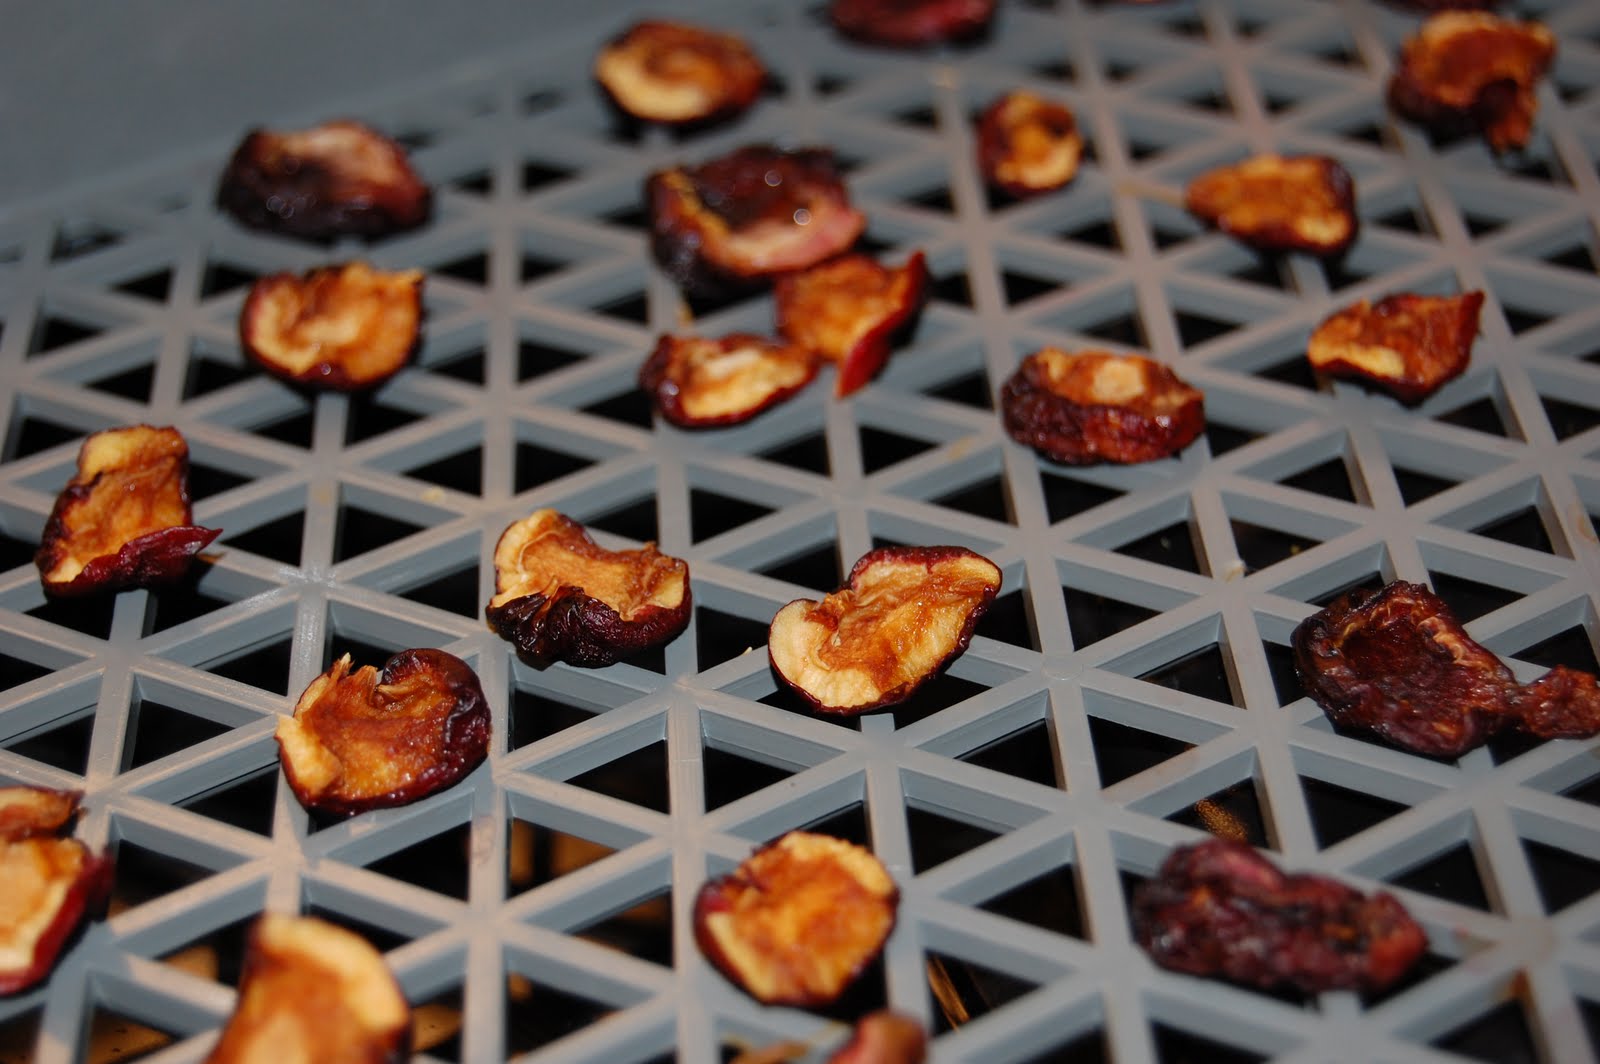
Lay them on you trays, with space between for the air to flow. Mine took about 16 hours to dry at 145 degrees.
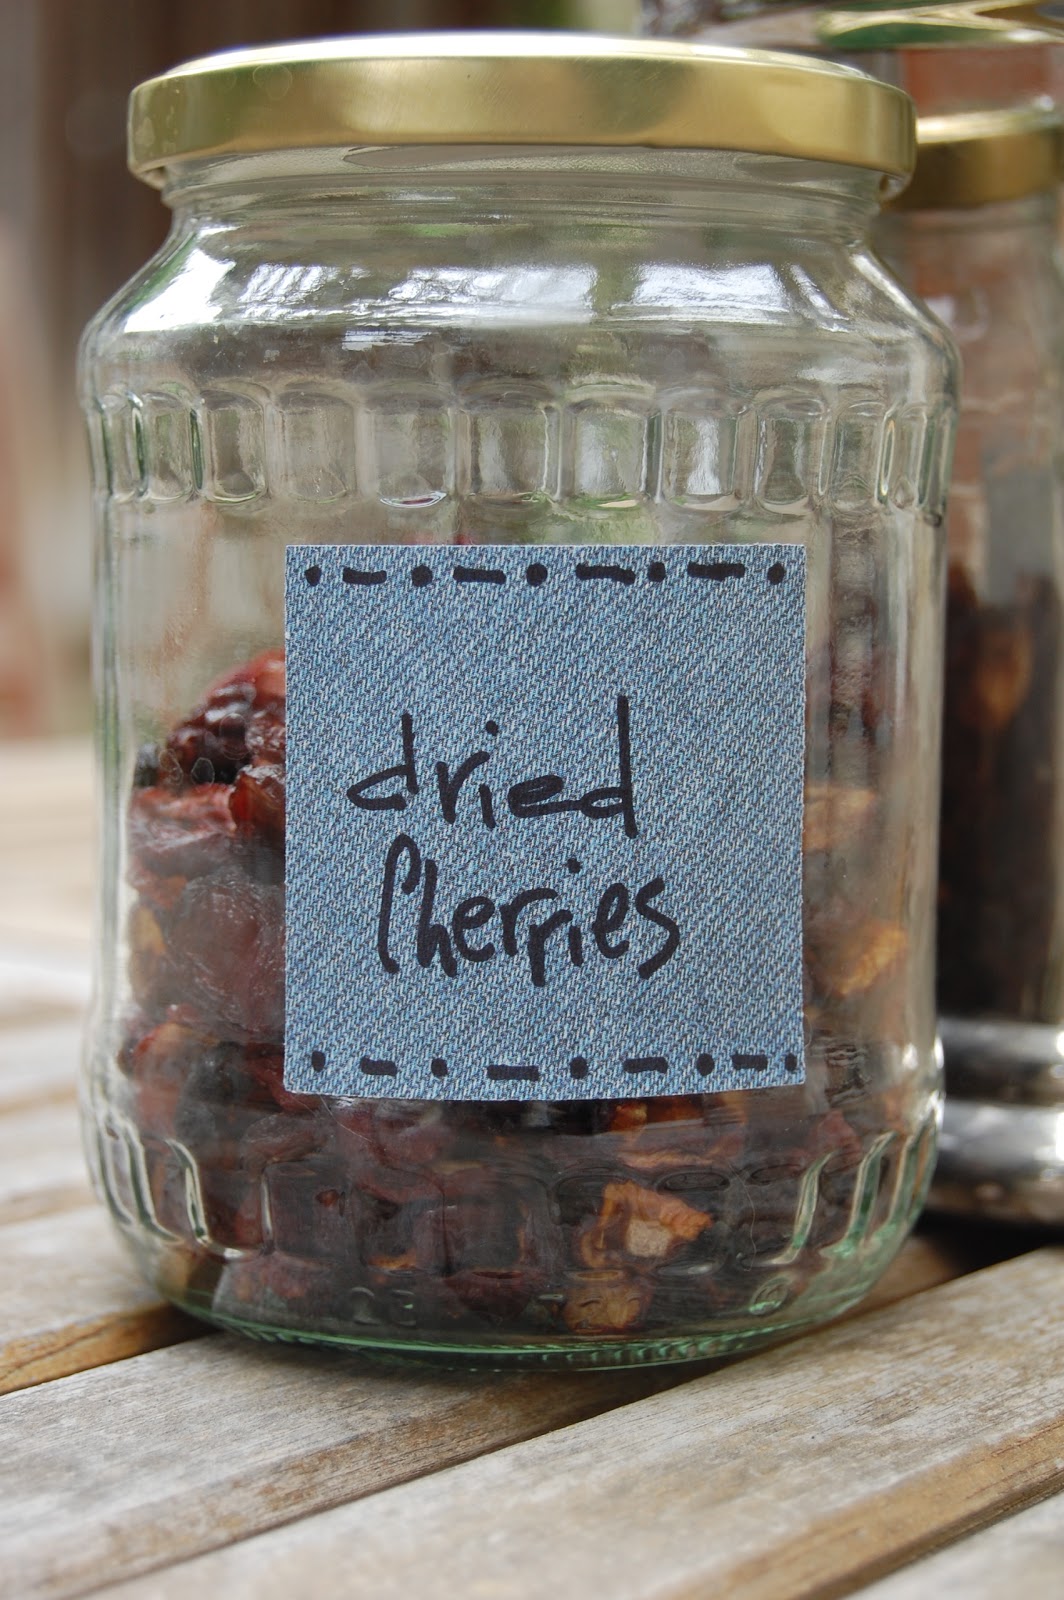
They are shriveled when done, but not crispy. They should have a similar consistency to raisins. If you are not sure, stick them in a glass jar with a tight lid for a couple of days. If you see any condensation form, throw them back into the dehydrator for another few hours.
Easy, wasn't it? We like ours in granola (my GF recipe is here), in oatmeal or chocolate cookies, on cereal, or just straight out of the jar for snacking!

Monday, May 23, 2011

From Sweater to Sweater Dress

The sweater. Dare I say that I actually found this one in the street? Lying in the road in front of the house, and extra large women's silk sweater, abandoned. So I washed it on hot and stuck it in the dryer, not knowing how it would turn out. It washed up beautifully, and shrank just a bit. So what to do?
Make a dress! I was hoping to have a picture of my daughter wearing it, since black is so difficult to photograph, but 9 year olds can be difficult to photograph, too, especially when they don't want their picture taken. To convert the sweater to a dress, I cut it apart down the center. To take up the shoulders, I ran a few rows of elastic thread near the seam. I trimmed a bit of fabric from both sides of the opening and seamed it. I used snaps for closures and added the oversize buttons for decoration. A pink cotton ruffle was sewn on for length, and the belt is made from a panel of the same cotton sewn with elastic thread. I do love the mix of the cotton and the sweater materials.

Sewing projects are bursting out of the closet and a few illustrations for a series I'm planning have made it to the sketchbook,  for the most part, I've had little time to do anything creative. We've spent two months going to different doctors and having loads of tests done on my son, and while it finally seems we have found someone who can really treat the cause and not just his symptoms, it has taken, and continues to take, much of my time. So my posts are erratic, yes, and they may continue to be for awhile, but hopefully summer will bring a little more calm and a lot more time for art.