Showing posts with label Lego. Show all posts

Friday, December 6, 2013

Lego Geometry - Circles


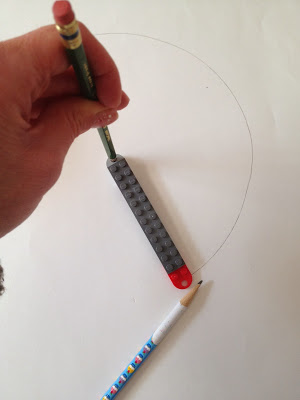
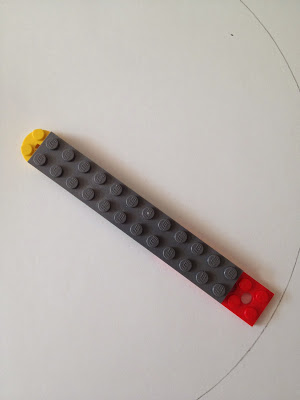
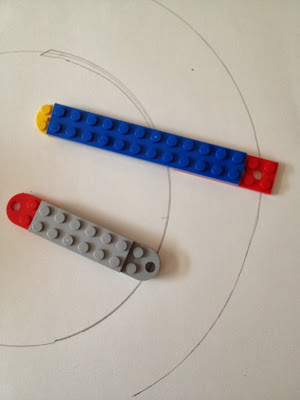
Circles from rectangular building blocks? Am I crazy? No, I did not give the kids the task of creating circles from Legos, but we did create tools from Legos to make circles! The bricks pictured above are the ones we found in our collection that worked the best, but sort through yours and see what you can find.


Our favorite compass consisted of a long rectangular flat block with a half circle piece at each end (the kind with the holes). To make a circle, secure the compass at one end with a sharp pencil, then use a second pencil through the other hole to trace your arc. It helps if you tape the paper down first or have somebody hold it.


Flat pieces that have holes in the center also work well. The circular piece needs a very sharp pencil point as only a small portion shows.


The kids experimented with different sized pieces to make smaller and larger circles. We discussed pi and they measured diameter and radius, as well as calculating circumference. Who said Legos can't make circles?


Sunday, October 13, 2013

Lego Geometry - Triangles and Polygons


After learning about the different types of angles, building them with Legos and measuring the tracings with protractors, we moved on to triangles and polygons. It's a pretty easy leap to take your Lego angles and add a third piece to make a triangle.


Easy in theory, yes, but in reality it can be difficult to find a third piece that is just the right size. Make sure you have as many pieces as you can scrounge out of those Lego bins for this activity, and remember you are looking for the shape inside the Lego, not around the perimeter. You would have a pretty wonky triangle if you tried to trace the outside, but look how nice they come out when you trace inside! We classified our triangles by sides ( equilateral, isosceles and scalene) and angles (right, acute and obtuse), then the kids traced examples of each in their math notebooks. You could also measure the angles of the triangles you traced with your protractor.


Break out those double row bricks for polygons, and of course you can use your single rows as well. The kids had fun combining different bricks to make some wild polygons. A polygon is a multi-sided  two dimensional figure made up of three or more line segments, so you can really go to town with building these shapes. We started out with traditional shapes such as squares and rectangles, then moved on to more creative builds. Since these were rather large constructions, the kids drew their examples instead of tracing them.

The real challenge is coming up next time - circles!

Sunday, May 19, 2013

The Lego Birthday

For a boy who has been obsessed with Lego from pretty much birth, it has taken us nine years to actually have a Lego themed birthday party. Of course the first place I turned was Pinterest, and you can find all of my inspiration on my birthday ideas board. I will be the first to admit that I was a bit over ambitious, considering I had an eight month old competing for my attention, but I think the late night crafting sessions were worth it.

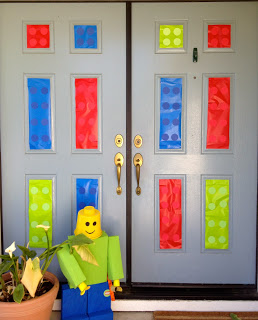
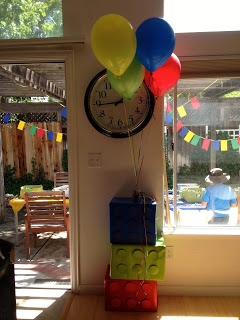
I used wrapping paper and punched cardstock circles to turn our front door into giant lego bricks. The Lego figure (our third place scarecrow from the Ruth Bancroft gardens contest last fall) held a bunch of balloons on the day of the party to welcome guests.

A birthday banner made using a Lego font and printables found on Pinterest.
Since Amazon is my best friend, I had plenty of boxes to wrap like giant Legos. The mini figure heads were from paper lanterns found in the dollar spot at Target and spray painted yellow. I just taped the features on so I could remove them later and re-use the lanterns for the baby's "You are my sunshine" themed birthday in July.
More giant Lego bricks and balloons that my AWESOME sister-in-law waited forty-five minutes to get! Who knew party stores had balloon traffic jams??
The birthday boy didn't want games, only building time, so we set up three large tables in the backyard and baskets of bricks. A simple cardstock brick banner and colored tablecloths were the only decorations.
Although the circles were punched and glued on, they didn't have enough dimension. Since I really didn't want to make a trip to the craft store for pop dots, I simply outlined the circles instead.
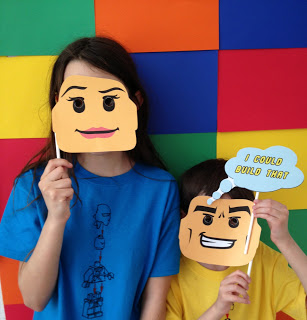
Cardstock again provided a backdrop for the party table. I used the extended area as a photo booth,
complete with props.
I think that may have been my favorite part.
I was too busy getting out the food to take pictures of it, but prior to the party the kids helped me assemble Lego juice boxes and utensil holders. For the party I used the crock pot hotdogs and fruit in waffle cones from my Pinterest birthday board, and all were pleased. I will definitely use both for the baby's party - so easy to prepare ahead of time!
I loved all of the brightly colored Lego party bags on saw on Pinterest, but our Michaels only had the white bags in stock. Sigh. At least it made the tags pop. Inside the favor bags were Lego mini figure crayons and chocolate bricks (I found both of the molds on Amazon) and a mini figure t-shirt that I silkscreened from an image in one of his instruction booklets. I loved the way the shirts turned out!
T-shirts are one of my favorite party favors - they won't rot your teeth or break after three days!
The boy was pleased, I think a good time was had by all, and I learned that it is never to early to begin planning. You can see my pins for the baby's birthday on my Pinterest board, too! Happy Birthday, big guy!

Sunday, September 9, 2012

Lego Towel


This is one of my favorite projects, and it's so easy! I don't have a tutorial, but it's simply an appliqué on a store bought towel (I got mine at Target for $5). I used fleece for the lego head. I chose fleece because it's soft and I had it on hand, but a micro-terry or french terrycloth would work as well. I did a Google search for lego heads and then drew the face on Wonder Bond free hand. I followed this procedure for the appliqué process, but I used a pressing cloth over the fleece (it melts!) and a lot of extra time to get the bond to stick. A little stitching and you have a custom Lego towel! It was Max's birthday present and has endured months of washing and is still going strong.