Showing posts with label birthday. Show all posts

Thursday, August 1, 2013

You Are My Sunshine Party

Yes, it's official - the baby is now a toddler. We had a small family party with a You Are My Sunshine theme. I had many plans for decor and food, but when the little guy decided to cut four teeth at once (yes, four!) the week before his party, I had to let many things go. That's okay; I'm pretty sure he didn't notice. I have some lovely felt and fabric birthday crowns pinned to my birthday board, but teething dictated a faster design. So, with a little craft felt and hot glue we had a birthday crown in the colors of the party. I used scrapbook paper from my stash to make the pinwheels on the table, and I placed a few in the grass leading up to the front door.


The plans for the pre-made mason jar drinks didn't quite materialize, but at least the straws and the jars did.


Sun, clouds, hot air balloons all worked together here. The baskets were made from strawberry baskets covered with scrapbook paper. The link for the cloud directions is on my birthday board.


Clouds were scattered on shelves as well. I used the yellow paper lanterns from the Lego Party on shelves in the living room.


Of course there had to be buntings! Most of the buntings were ones I had made for my mother's birthday party a few years ago, and fortunately they had the right color scheme, as did my wall;)


I really tried to pull all of my materials from my own stash, including the top banner. The letters were stamped onto punched kraft paper circles.


The back wall held our sun. I like big displays for decorating.

The banner was hand lettered on paper and the ends are scrapbook paper.


Of course there had to be a sun!
I used my GFCF carrot cake recipe for the cupcakes.
I couldn't resist adding a few cute shots!


Happy Birthday Alex!

Sunday, May 19, 2013

The Lego Birthday

For a boy who has been obsessed with Lego from pretty much birth, it has taken us nine years to actually have a Lego themed birthday party. Of course the first place I turned was Pinterest, and you can find all of my inspiration on my birthday ideas board. I will be the first to admit that I was a bit over ambitious, considering I had an eight month old competing for my attention, but I think the late night crafting sessions were worth it.

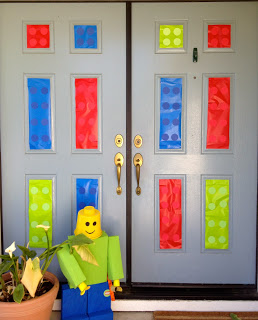
I used wrapping paper and punched cardstock circles to turn our front door into giant lego bricks. The Lego figure (our third place scarecrow from the Ruth Bancroft gardens contest last fall) held a bunch of balloons on the day of the party to welcome guests.

A birthday banner made using a Lego font and printables found on Pinterest.
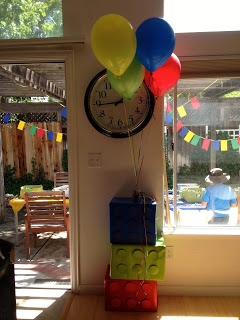
Since Amazon is my best friend, I had plenty of boxes to wrap like giant Legos. The mini figure heads were from paper lanterns found in the dollar spot at Target and spray painted yellow. I just taped the features on so I could remove them later and re-use the lanterns for the baby's "You are my sunshine" themed birthday in July.
More giant Lego bricks and balloons that my AWESOME sister-in-law waited forty-five minutes to get! Who knew party stores had balloon traffic jams??
The birthday boy didn't want games, only building time, so we set up three large tables in the backyard and baskets of bricks. A simple cardstock brick banner and colored tablecloths were the only decorations.
Although the circles were punched and glued on, they didn't have enough dimension. Since I really didn't want to make a trip to the craft store for pop dots, I simply outlined the circles instead.
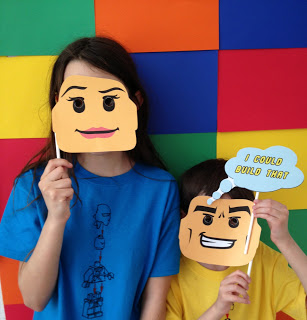
Cardstock again provided a backdrop for the party table. I used the extended area as a photo booth,
complete with props.
I think that may have been my favorite part.
I was too busy getting out the food to take pictures of it, but prior to the party the kids helped me assemble Lego juice boxes and utensil holders. For the party I used the crock pot hotdogs and fruit in waffle cones from my Pinterest birthday board, and all were pleased. I will definitely use both for the baby's party - so easy to prepare ahead of time!
I loved all of the brightly colored Lego party bags on saw on Pinterest, but our Michaels only had the white bags in stock. Sigh. At least it made the tags pop. Inside the favor bags were Lego mini figure crayons and chocolate bricks (I found both of the molds on Amazon) and a mini figure t-shirt that I silkscreened from an image in one of his instruction booklets. I loved the way the shirts turned out!
T-shirts are one of my favorite party favors - they won't rot your teeth or break after three days!
The boy was pleased, I think a good time was had by all, and I learned that it is never to early to begin planning. You can see my pins for the baby's birthday on my Pinterest board, too! Happy Birthday, big guy!

Sunday, September 9, 2012

Lego Towel


This is one of my favorite projects, and it's so easy! I don't have a tutorial, but it's simply an appliqué on a store bought towel (I got mine at Target for $5). I used fleece for the lego head. I chose fleece because it's soft and I had it on hand, but a micro-terry or french terrycloth would work as well. I did a Google search for lego heads and then drew the face on Wonder Bond free hand. I followed this procedure for the appliqué process, but I used a pressing cloth over the fleece (it melts!) and a lot of extra time to get the bond to stick. A little stitching and you have a custom Lego towel! It was Max's birthday present and has endured months of washing and is still going strong.

Monday, May 24, 2010

Kid's Birthday Card Tutorial

Today I have two quick cards for those last minute attachments to gifts before heading to the party. The first one is super simple:

Punch one large and two small circles from scrap paper; edge them with ink.

Stamp a rocket on another scrap and cut out.

Attach circles and rocket to card front. Add some stamped or Dymo text and you're done!

The second card uses one of my favorite techniques - faux stitching.

Attach a piece of patterned paper to a cardstock blank. Using a paper piercer (or a thick needle), poke holes around the perimeter. I just eyeball it, but you can mark even spaces with a ruler first, if you like to be precise.

Using a fine tipped black pen, draw lines from hole to hole, allowing the tip to dip into each hole.

Cut out an image from your patterned paper (or use a stamp, collage piece, scrapbooking embellishment, etc.).

Punch a contrasting circle from scrap paper and attach your image. Glue both to the face of the card.

Attach stamped or computer generated text and you're done! Now you're ready to party!

Monday, May 17, 2010

Monday Birthday Card Tutorial Week 1

Summer always seems to be filled with birthdays, especially July for our family. And, if you are like me, you are usually pulling out papers 20 minutes before a party, hastily throwing a card together. Well, I decided to do a little planning this year and make some cards ahead of time, to avoid the last minute rush. Each Monday I'll show you a few simple card tutorials so you won't be scrambling at the last minute, either!

Since the adult birthdays fall in spring and early summer for our family, I decided to share two sophisticated cards this week, suitable for adult birthdays.

For this card, I attached a gray panel to a striped background piece. Cards are perfect for using the scraps cluttering up your desk!

I printed a quote from the computer, cut it apart, and edged it with Distress Ink.

A simple stamp was added to the corner.

I punched a few lacing holes, inserted eyelets and laced it with waxy twine.

Glue on the text and attach card face to folded cardstock. Done!

For the second card, stamp a background print on an old book page. Tear it out around the edges and run an ink pad along the sides.

Stamp a floral print on a scrap of cardstock.

Stamp a butterfly on a scrap and cut out. Alternately, you could use a butterfly punch.

Assemble the card: attach the text page to a patterned paper background, add floral piece, butterfly and a little birthday text. Secure face to a folded piece of cardstock and you are done!

Wednesday, April 8, 2009

Max's Invitation


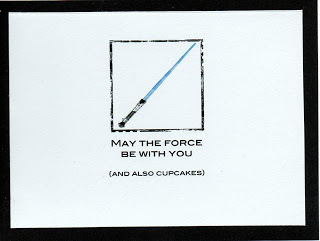
His party is, obviously, a Star Wars theme. I had originally designed an invitation with a cool cartoon image of Luke Skywalker (Muggs style), holding a lightsaber, but when Max saw it the next morning he told me:

"No, mommy! It's all wrong! I only want a blue lightsaber on there, that's all!"

While I like the design, I think it looks a little sophisticated for an almost five year old. But that's what he wants - simple. One game. A jumpy house. Lightsabers. No costumes. Is her really only five?